
Last Updated on July 6, 2023 by Ellen Christian
If you’re wondering how to make a wreath for the front door, keep reading for an easy Americana wreath tutorial that’s perfect for summer.
Posts may be sponsored. This post contains affiliate links, which means I will make a commission at no extra cost to you should you click through and make a purchase. As an Amazon Associate I earn from qualifying purchases.
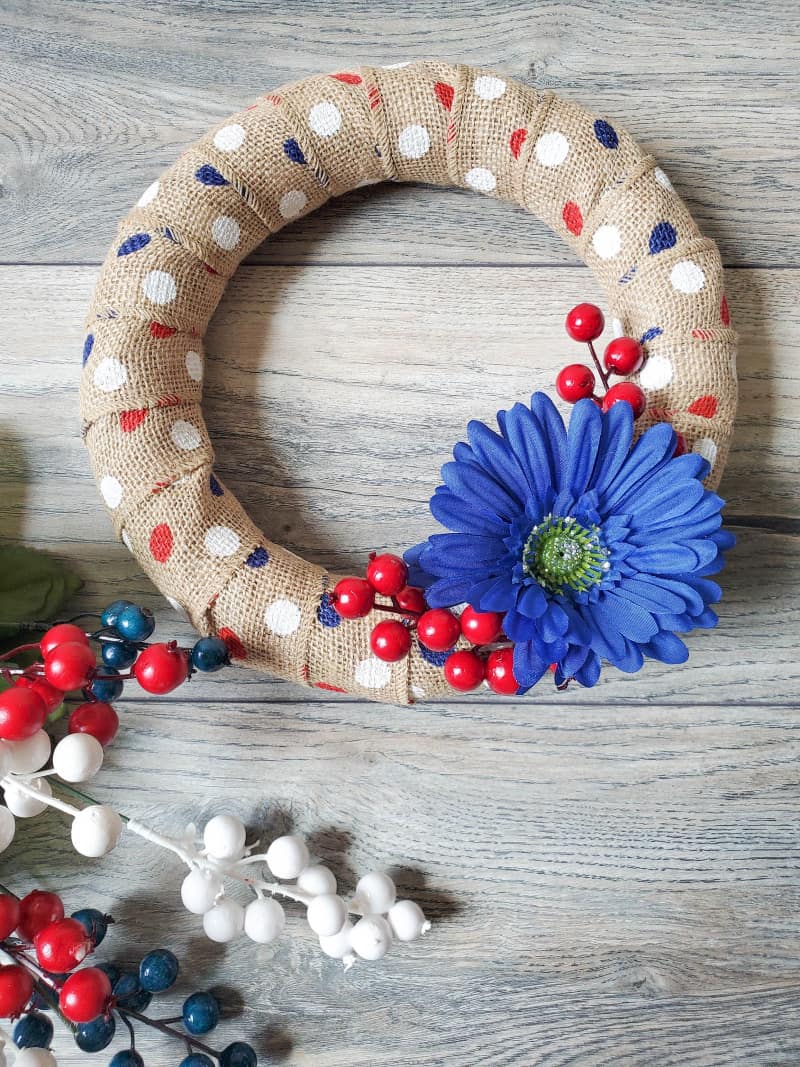
Americana Wreath Tutorial
This patriotic outdoor wreath is a wonderful way to dress up your home and share your American pride. You may want to try this patriotic door wreath next.
We don’t do a lot of patriotic outdoor decor but I do love adding a wreath to the front door. I’ve written in the past about how to take care of fresh evergreen wreaths. These are tips for a natural Christmas wreath I follow each year. You can make a wreath without a wreath form or make an apple grapevine wreath.
There are so many different ways to make a patriotic wreath. I love the burlap wreaths I see all over Pinterest. And, I would like to try to make a patriotic flower wreath one of these days. Some of them seem like they’d be fairly complicated though.
This Americana wreath tutorial is something that even a beginner can do. I prefer simple crafts because I just don’t have the time to devote to something that will take hours to complete.
If you are looking for more ideas, you might want to try this Easter spring wreath. Find out the answer to are lilac flowers edible and try some today.
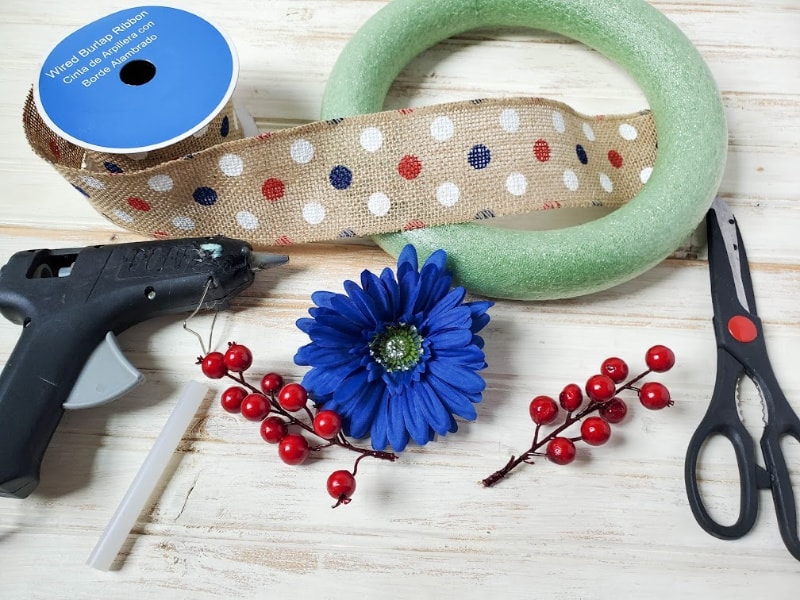
Supplies to complete the Americana Wreath tutorial
- 10” foam wreath form
- 9’ of 2.5” ribbon – polka dot burlap/jute (from Walmart)
- 1 – blue daisy flower, removed from stem
- 2 – red berry floral, removed from stem
- Hot glue gun with glue
- Scissors

Variations in color
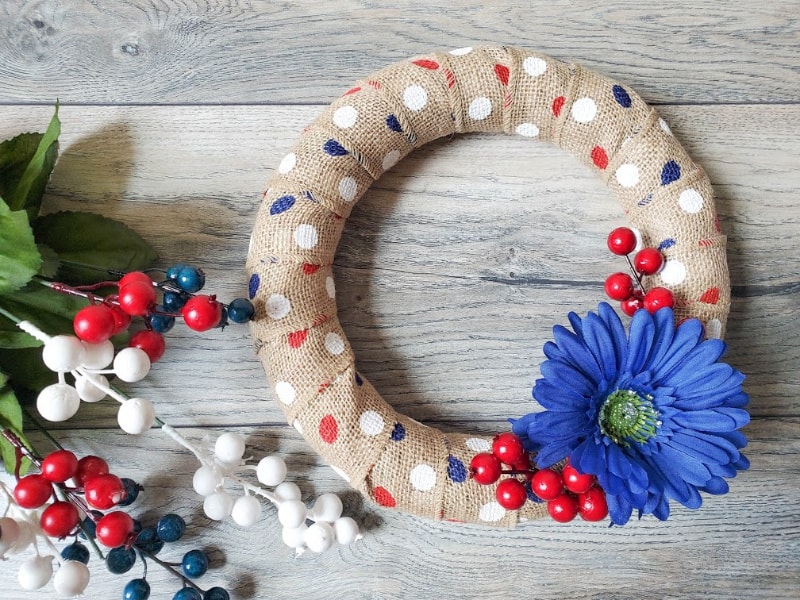
This Americana wreath tutorial was made using jute or burlap ribbon with red, white, and blue polka dots. It was found at Walmart. But, the beauty of this wreath craft is that you can change up the colors and accessories very easily.
If you want a spring wreath for your front door, use plain jute ribbon and instead of the red and blue floral accessories, add tulips, or even Easter eggs instead. You could use forsythia branches or even lilacs.
Fall decor could be made by using plain jute or burlap ribbon and adding fall leaves, mini pumpkins, or even sunflowers. Make it spooky with wooden bats and ghosts if you want something for Halloween.
The variations to this Americana wreath tutorial are really endless.
Can I hang this Americana wreath outside?
It’s meant to be hung on the front door. But, keep in mind that the supplies are not waterproof or water-resistant. So, it is best to hang it in an area that is protected like between the front door and the outer storm door. Otherwise, hang it inside over the mantel or on a wall instead.
Americana wreath tutorial
Scroll to the end of this post for the printable version of this craft.
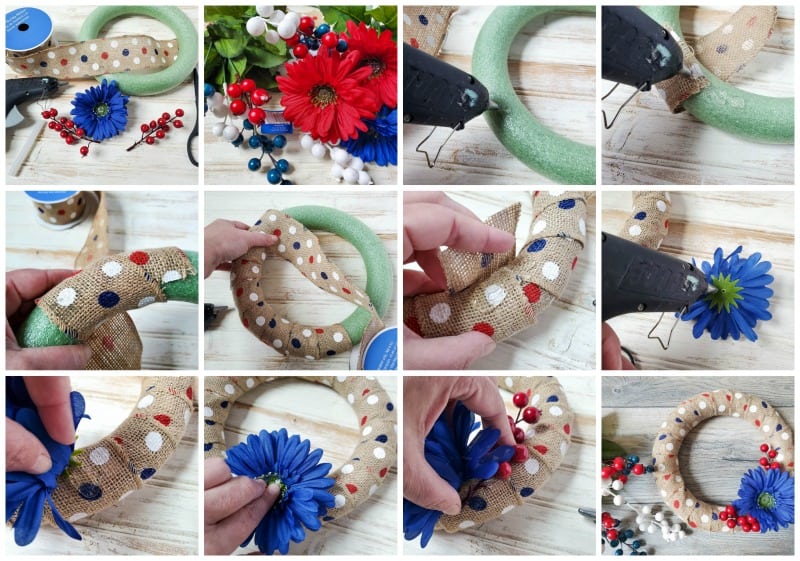
- Apply a 2” strip of hot glue to the wreath form, and attach one end of the ribbon, holding it down to secure. You can use scissors to hold it down so that you don’t burn your fingers.
- Once dry, apply a 2” strip of hot glue on top of 1” of the ribbon and 1” of the wreath form, and wrap the ribbon around and on top, overlapping the first strip of ribbon slightly. Hold the ribbon down to secure until the glue dries.
- Continue to wrap the ribbon around the wreath, slightly overlapping as you go.
- Once you get to the end of the wreath, apply hot glue to hold the end of the ribbon in place, making sure that it ends in the back so that you don’t see it.
- Flip the wreath to the front, and apply hot glue to the daisy flower and adhere to the front area right where you ended the ribbon. Hold the flower in place until the glue dries.
- Repeat step 5 with the berry floral, adhering them to each side of the daisy, placing the stem under the daisy.
- Wrap a piece of jute around the wreath to hang on a wreath hanger.
More patriotic crafts
If you enjoyed this Americana wreath tutorial you might like these.
Americana Wreath Tutorial for the Front Door
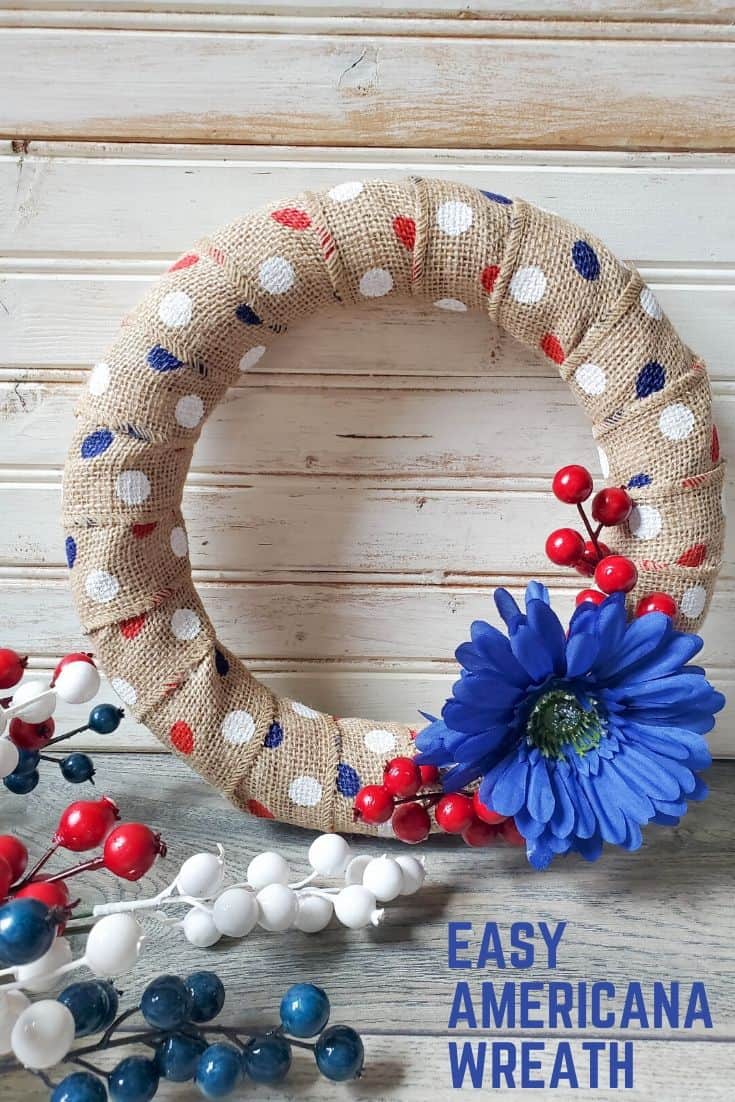
Easy Americana wreath tutorial for the front door
Materials
- 10” foam wreath form
- 9’ of 2.5” ribbon – polka dot burlap/jute (from Walmart)
- 1 – blue daisy flower, removed from stem
- 2 – red berry floral, removed from stem
- Hot glue gun with glue
- Scissors
Tools
- scissors
Instructions
- Apply a 2” strip of hot glue to the wreath form, and attach one end of the ribbon, holding it down to secure. You can use scissors to hold it down so that you don’t burn your fingers.
- Once dry, apply a 2” strip of hot glue on top of 1” of the ribbon and 1” of the wreath form, and wrap the ribbon around and on top, overlapping the first strip of ribbon slightly. Hold the ribbon down to secure until the glue dries.
- Continue to wrap the ribbon around the wreath, slightly overlapping as you go.
- Once you get to the end of the wreath, apply hot glue to hold the end of the ribbon in place, making sure that it ends in the back so that you don’t see it.
- Flip the wreath to the front, and apply hot glue to the daisy flower and adhere to the front area right where you ended the ribbon. Hold the flower in place until the glue dries.
- Repeat step 5 with the berry floral, adhering them to each side of the daisy, placing the stem under the daisy.
- Wrap a piece of jute around the wreath to hang on a wreath hanger.

Ellen is a busy mom of a 24-year-old son and 29-year-old daughter. She owns six blogs and is addicted to social media. She believes that it doesn’t have to be difficult to lead a healthy life. She shares simple healthy living tips to show busy women how to lead fulfilling lives. If you’d like to work together, email info@confessionsofanover-workedmom.com to chat.