
Last Updated on April 12, 2022 by Ellen Christian
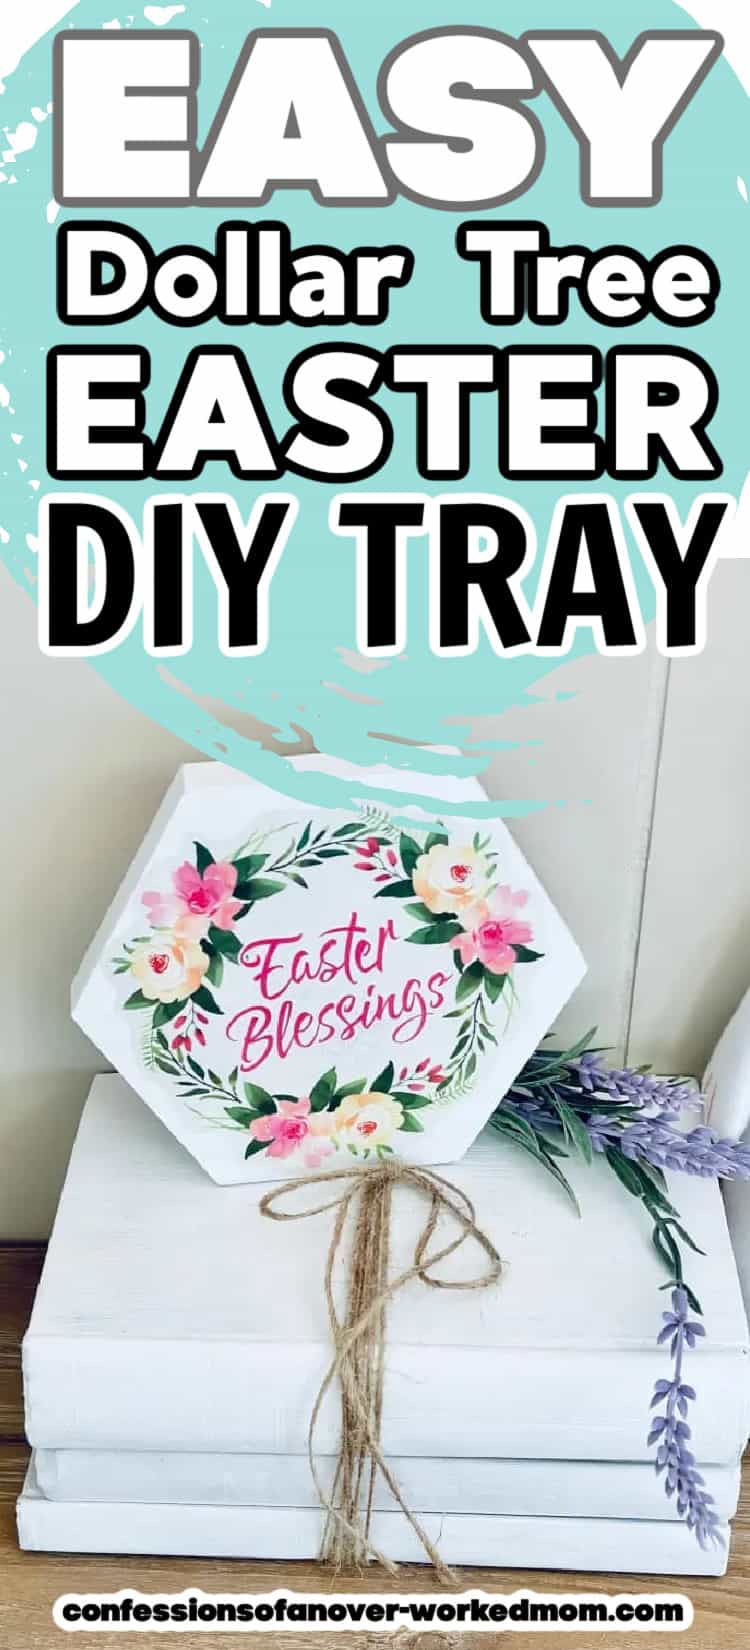
Check out this Dollar Tree Easter DIY! If you are looking for Dollar Tree Easter decorations, make this Blessing Tray with supplies from your local dollar store.
Posts may be sponsored. This post contains affiliate links, which means I will make a commission at no extra cost to you should you click through and make a purchase. As an Amazon Associate I earn from qualifying purchases.
Dollar Tree Easter DIY
There are so many Dollar Tree Easter ideas that you can use for decor this Easter season. If you want a good budget craft project, this Easter Blessings Tray is a great spring project.
I’ve shared a few Dollar Tree craft tutorials before that are so much fun to make. This spring wreath is one of my favorite Easter crafts.
I love that the supplies at Dollar Tree are so budget-friendly. I can find craft ideas year-round without spending too much money. There are lots of great Dollar Tree ideas!
How much do Dollar Tree Easter decorations cost?
The cost of this project will depend on how many trays you want to make. You can make one tray for under $5.00.
The items at Dollar Tree cost between $1 and $1.25 each so there are lots of great budget Easter ideas there.

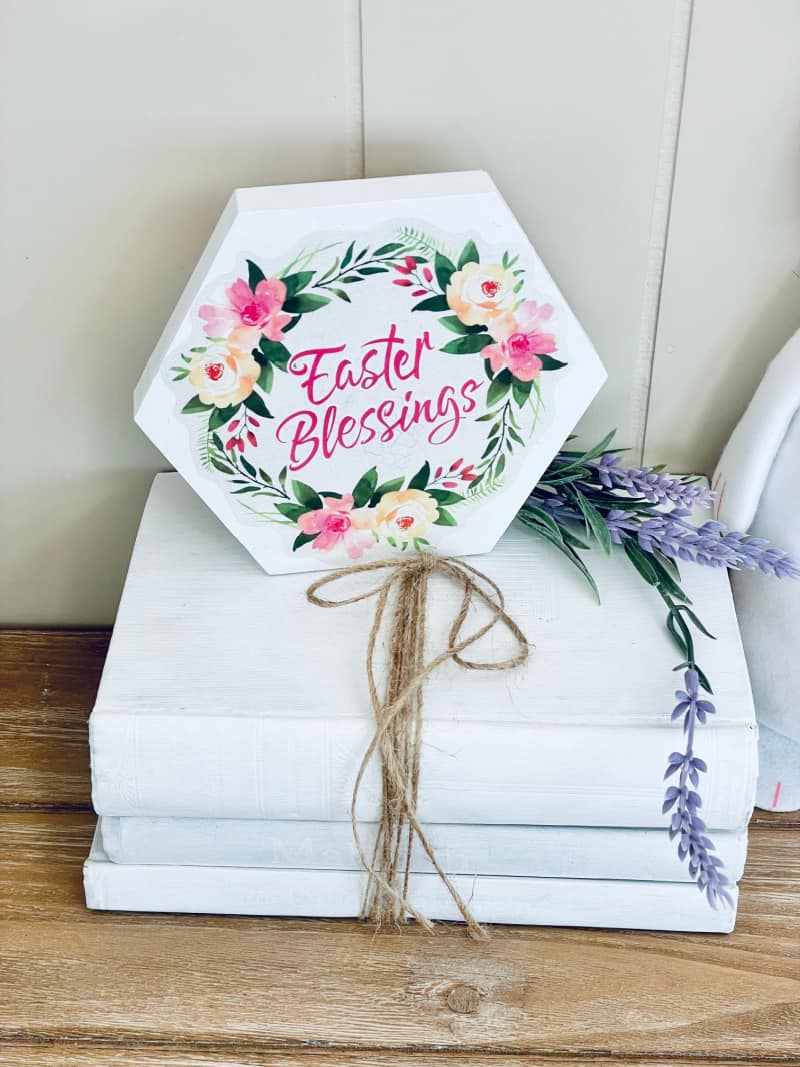
Easter Blessings Tray
You can use this Dollar Tree DIY Easter tray as a centerpiece for your Easter table. Or, you can lean it against the mantle and use it as a sign to decorate your home.
I try to check the seasonal aisle as soon as the new products hit shelves. Otherwise, it’s harder to find the supplies I need for my Easter craft ideas.
If you can’t find these supplies at Dollar Tree when you visit, you can adjust what you use or check on places like Amazon.
This Dollar Tree Easter DIY uses a cute window cling to create the Easter saying. You can use whichever Easter cling you find at your store to change up the decor.
An Easter basket would be cute or even jelly beans and plastic eggs if you want an adorable idea for a kid’s table. I love decorating for Easter!
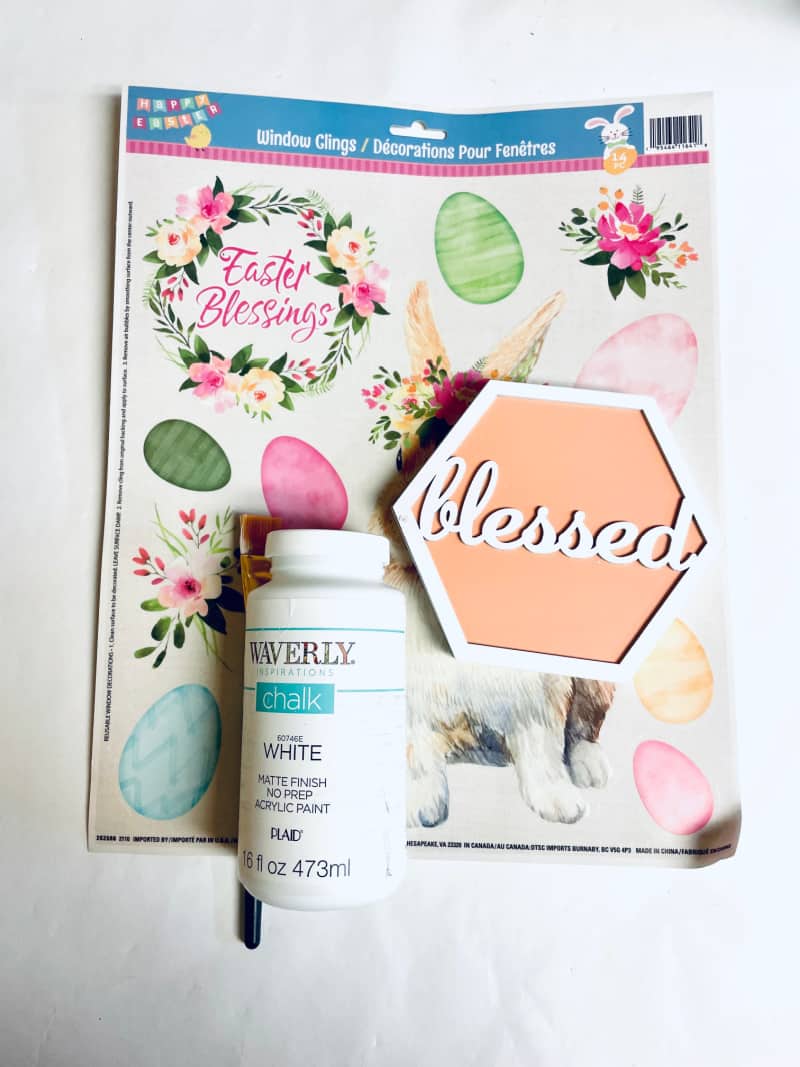
Materials from Dollar Tree
This is very budget friendly as you only need a few supplies. If you can’t find them any longer at Dollar Tree, check the links for Amazon.
- Dollar Tree Window Cling (check Amazon)
- Paint Brush
- Waverly White Chalk Paint or whatever white paint you have on hand
- Dollar Tree Blessed Wooden Décor
- Mod Podge
As I mentioned, you can use another Easter window cling from Dollar Tree if you can find this exact one. And, another type of wooden decor would work if you’re creative.
How to make Dollar Tree Easter Blessings Tray
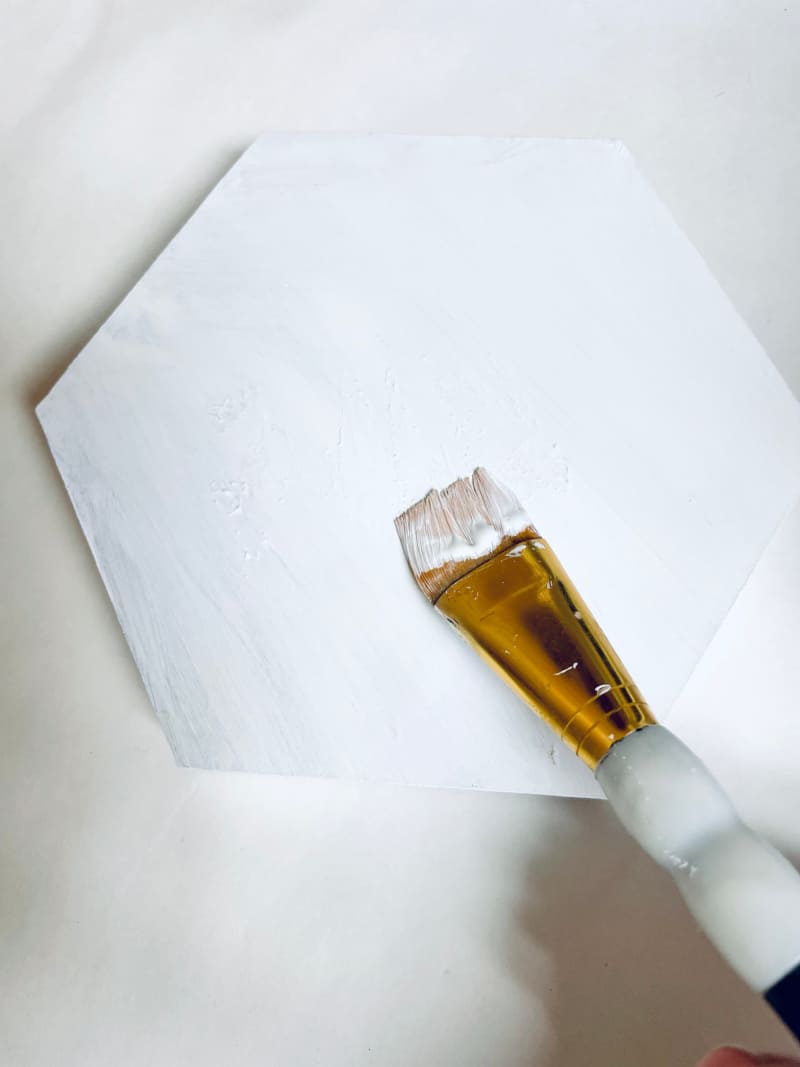
Start by painting the backside of the blessed wooden décor with 3 coats of Waverly white chalk paint (if you are not using chalk paint it may take a few more coats). To be sure it’s completely coated, you may want to use up to three coats.
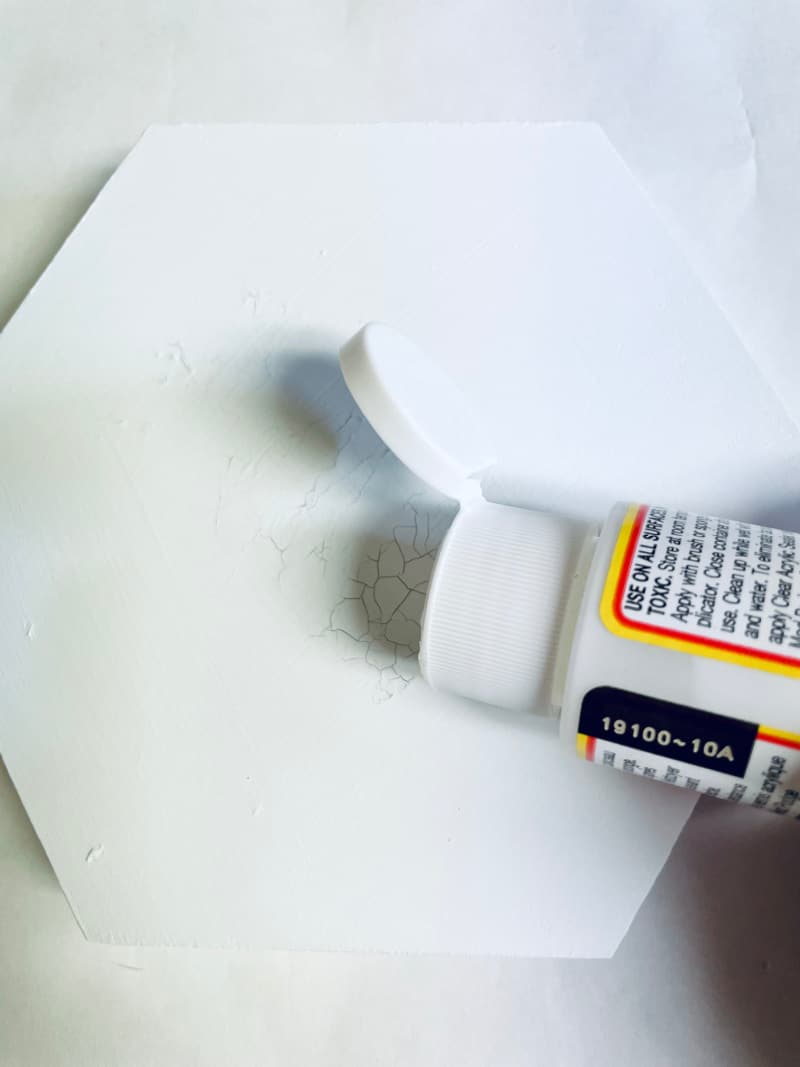
Once it is completely dry and this is important, apply a thin layer of the mod podge. If the paint is not completely dry the mod podge will mess the paint up.
Then place the Easter blessings window cling on top and then apply a thin layer of the mod podge to the top to make sure that it adheres
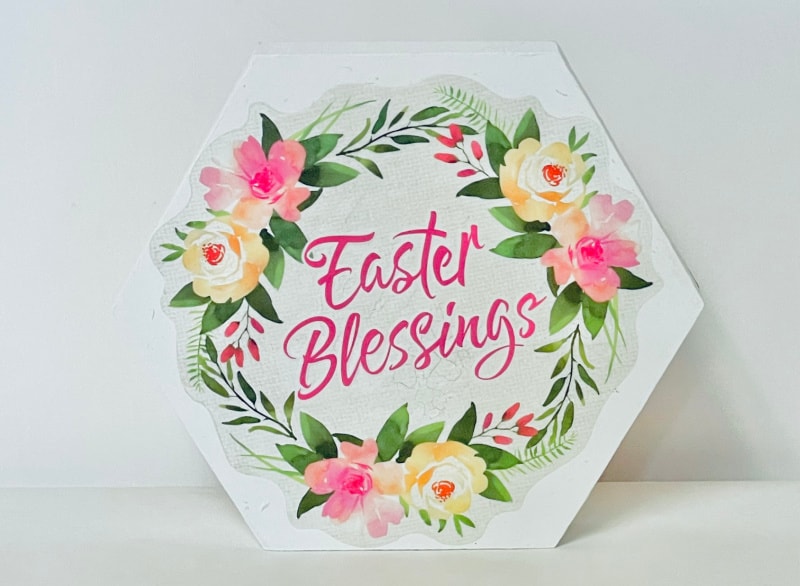
Once completely dry, style and enjoy your adorable Easter Blessings Tray.
Note: Don’t forget to let the kids in on have fun making this Dollar Tree decor item. They can help you paint and apply the window cling. They will love seeing their Dollar Tree decor on the Easter table this year.
Can I put food on this Dollar Tree Easter tray?
No. This is not safe for food and cannot be washed it if gets dirty. If you need to, you can very gently wipe the surface with a slightly damp cloth.
More spring DIY projects
Check out a few of these projects you can make for spring or Easter. The whole family can have fun with the things you find at Dollar Tree.

More Dollar Tree Easter ideas
If you have a few Dollar Tree Easter eggs or want other Dollar Tree craft ideas, you may want to check these out.
I love all of the fun ideas you can make using Dollar Tree carrots and painted bunnies. You can even add an Easter egg or two to your cart so you can come up with more decor ideas.
You can start with an Easter Bunny and turn it into all sorts of projects with a bit of spray paint and some Easter eggs.
Check out these Dollar Tree decor ideas:
Dollar Tree Easter DIY Tray
Check out this Dollar Tree Easter DIY! If you are looking for Dollar Tree Easter decorations, make this Blessing Tray with supplies from your local dollar store.
Materials
- Dollar Tree Window Cling
- Paint Brush
- Waverly White Chalk Paint or whatever white paint you have on hand
- Dollar Tree Blessed Wooden Décor
- Mod Podge
Tools
- paint brush
Instructions
- Start by painting the backside of the blessed wooden décor with 3 coats of Waverly white chalk paint (if you are not using chalk paint it may take a few more coats). I wanted to make sure that it was completely covered so hence the 3 coats.
- Once it is completely dry and this is important, apply a thin layer of the mod podge. If the paint is not completely dry the mod podge will mess the paint up. Then place the easter blessings window cling on top and then apply a thin layer of the mod podge to the top to make sure that it adheres
- Once completely dry, style and enjoy!

Ellen is a busy mom of a 24-year-old son and 29-year-old daughter. She owns six blogs and is addicted to social media. She believes that it doesn’t have to be difficult to lead a healthy life. She shares simple healthy living tips to show busy women how to lead fulfilling lives. If you’d like to work together, email info@confessionsofanover-workedmom.com to chat.