
Last Updated on March 26, 2023 by Ellen Christian
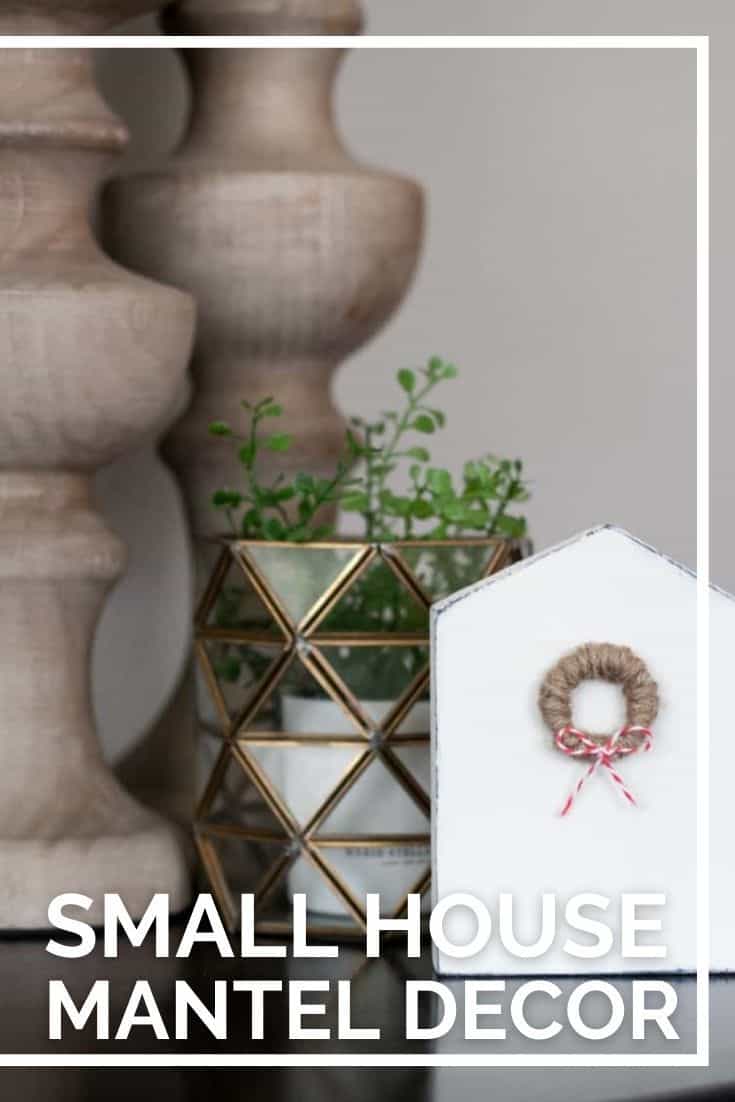
Check out this easy small wooden house craft that’s perfect for your mantel. Make your own small wooden house decoration with this tutorial.
Posts may be sponsored. This post contains affiliate links, which means I will make a commission at no extra cost to you should you click through and make a purchase. As an Amazon Associate I earn from qualifying purchases.
Small Wooden House Craft
If you want to create a focal point in your living room, it’s entirely possible that it’s your fireplace. So, why not try making this easy decoration.
There are lots of easy wood crafts that you can make. If you’re handy yourself, you can probably tackle it on your own. Otherwise, have your spouse or friend help.
I love the way mantels and bookshelves look with tiny wooden houses placed near each other to form a village or community. It’s a fun way to decorate that really appeals to me.
There are some really complicated little wooden houses ideas. But, I really wanted something that was uncluttered and had a country feel to it to match my home.
You can place this house alone on a shelf or mantel. Or, you can make three or four of them and paint them all different colors to create a little town.
What is the best wood to use?
This small wooden house craft was made with pine scraps. But, if you happen to have another type of wood leftover from a wood project, you can definitely use that instead.
You want a piece that is at least 5″ long and doesn’t have knots or cracks in it. Look for a nice, smooth surface without blemishes.
Best paint for wooden house decorations
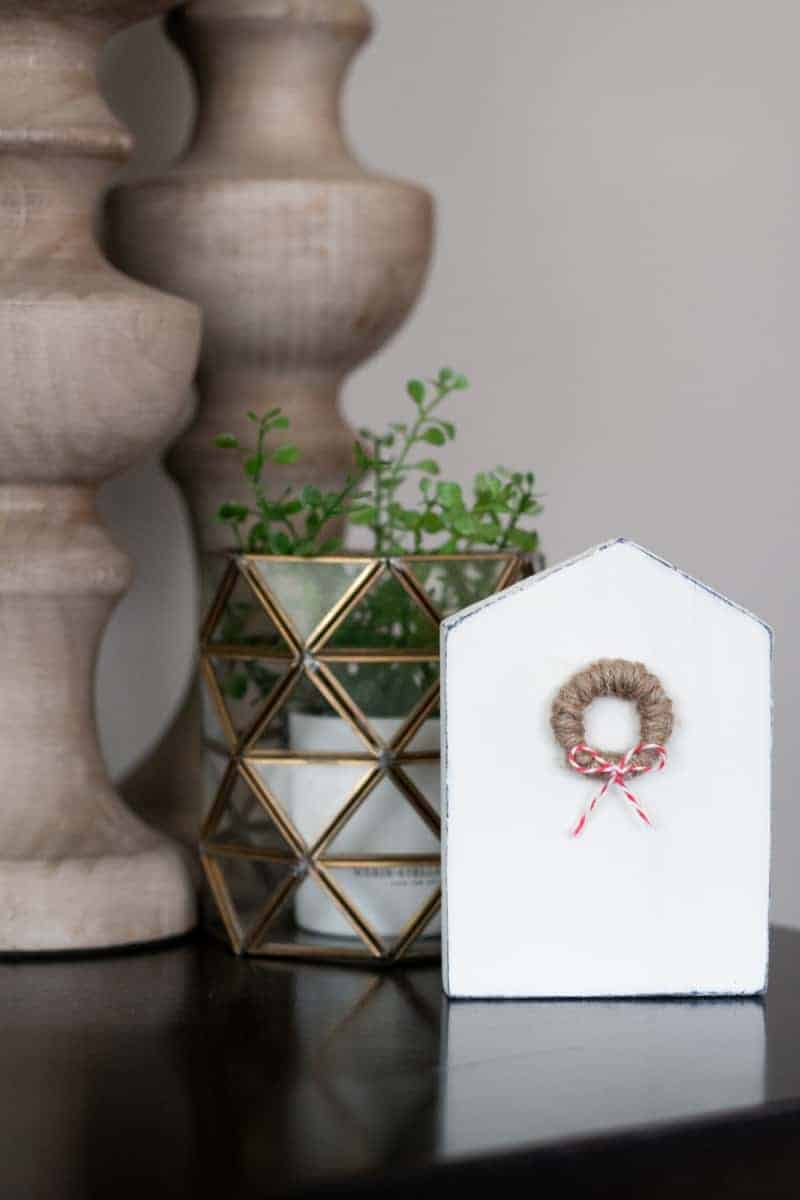
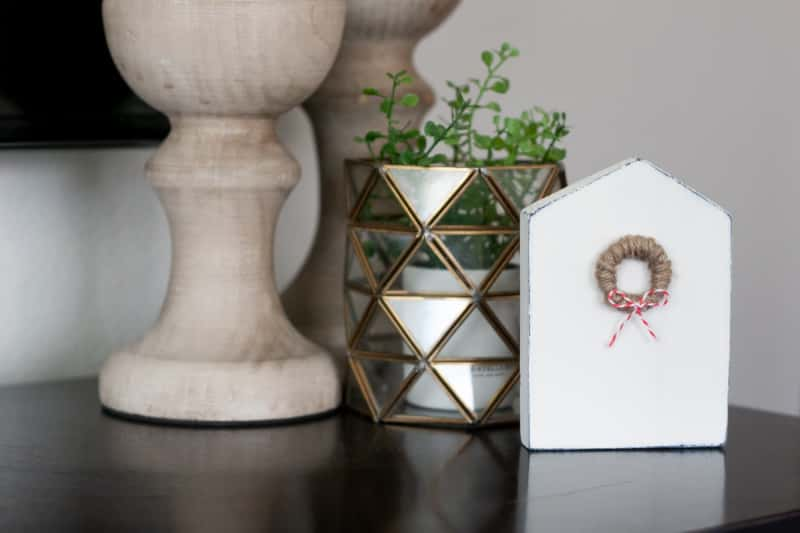
This craft will be displayed inside so acrylic paint works well. This was done with white paint to best show off the cute little jute wreath on the front.
But, you can paint your houses any color you want to. Just be sure that the color is light enough so that you can see the black Sharpie marks on it.
Create several of them in different colors and place them in a row. You could even make some of them taller than the others for visual interest.
Small wooden house craft materials
- Pine lumber (1×6) at least 5″ long
- Pencil
- Ruler
- Hand saw
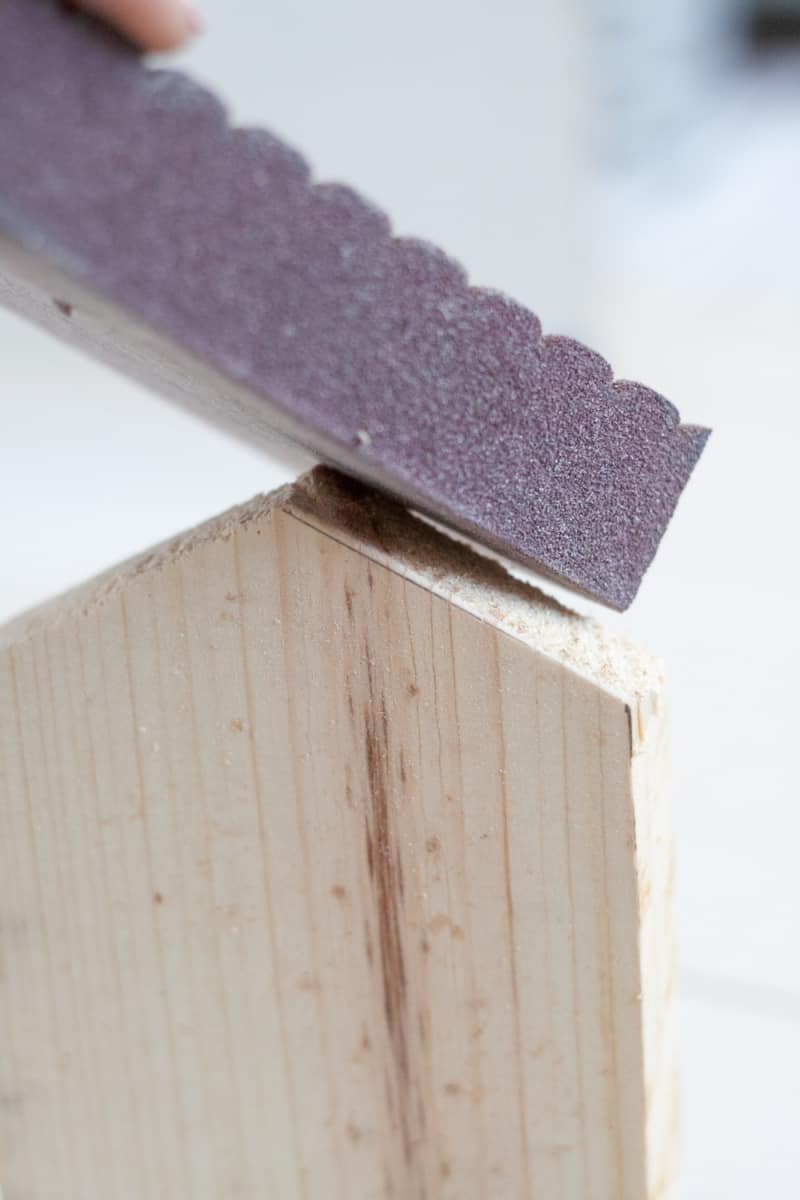
- Sandpaper

This product presentation was made with AAWP plugin.
- Black Sharpie
- Hot glue and glue gun
What if I don’t have a saw?
So if tools, in general, aren’t your thing, you can easily start with one of the wooden craft houses to paint from your local craft store. Then, you will have the shape already made.
You’ll just need to paint and create the little wreath to get this same design. You can start with this wooden house.
How to make a small wooden house
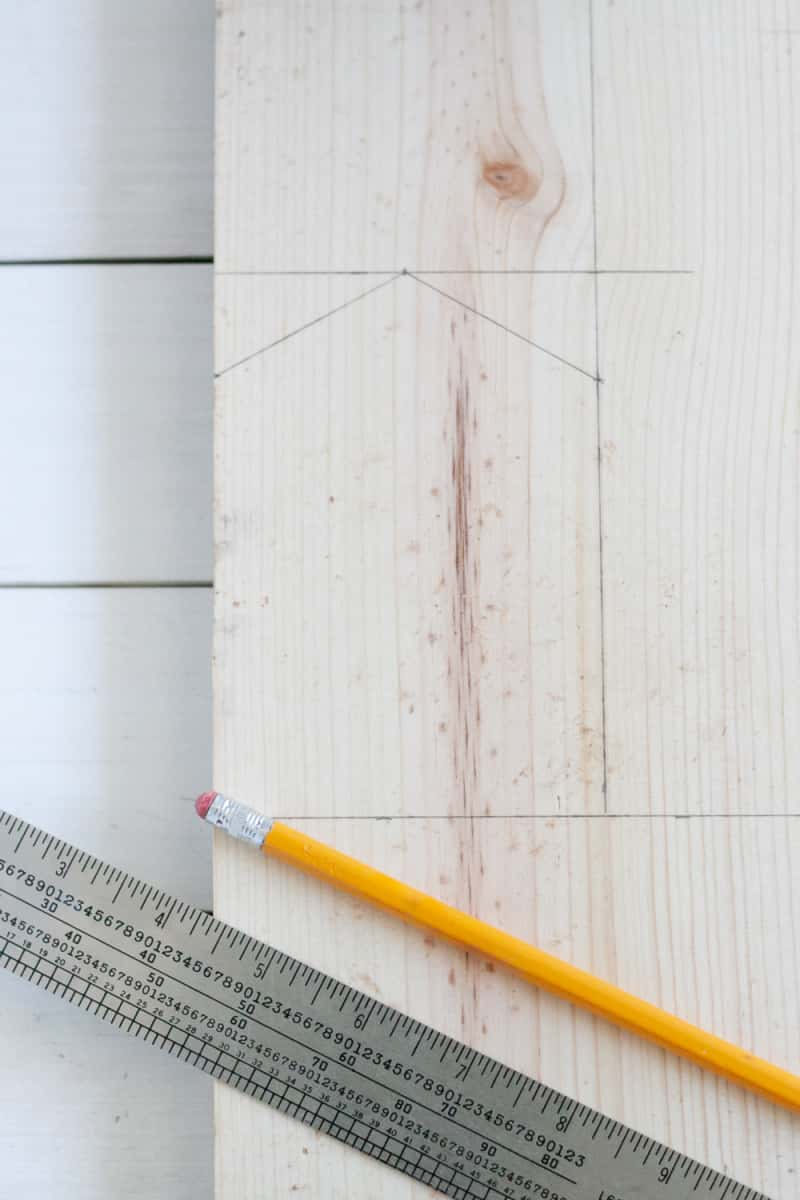
- Mark out your house on the piece of pine using a ruler and a pencil. Start with a rectangle that’s 5” tall by 3.5” wide. On your top line, make a pencil mark at the halfway point (1.75” inches from the edge) for the peak of your roof. On the sides, measure down 1” from the top and make a mark for the bottom edges of the roof. Draw a line from each of the edge roof marks to the peak mark. Once you have your house drawn out, use a hand saw to carefully cut it out.
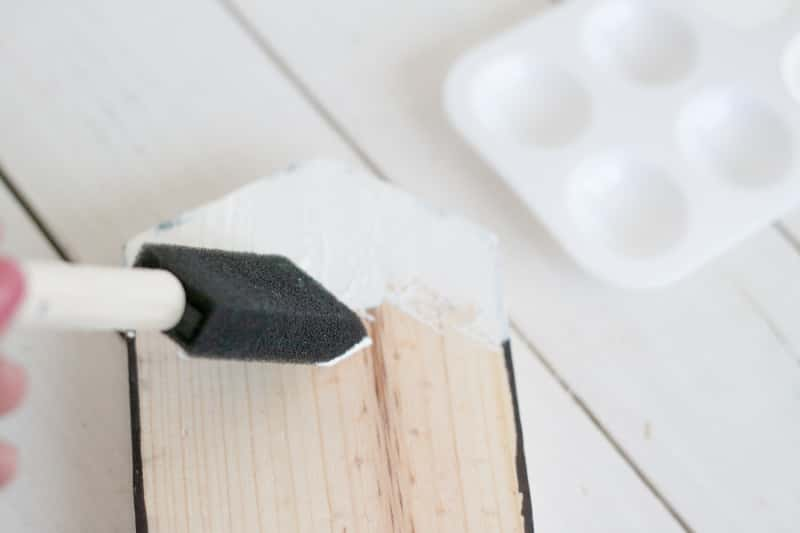
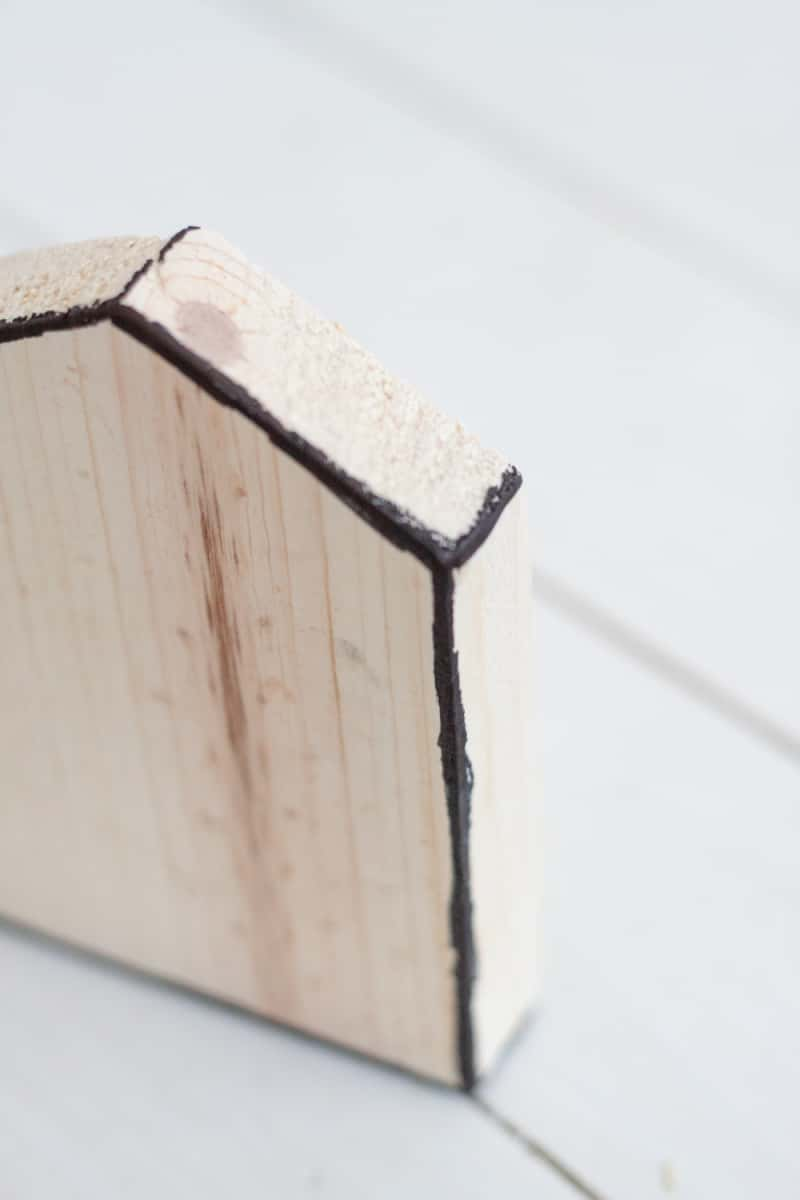
- Use a black permanent marker to outline all of the edges of the wood house to make the darker edges when you sand the paint down.
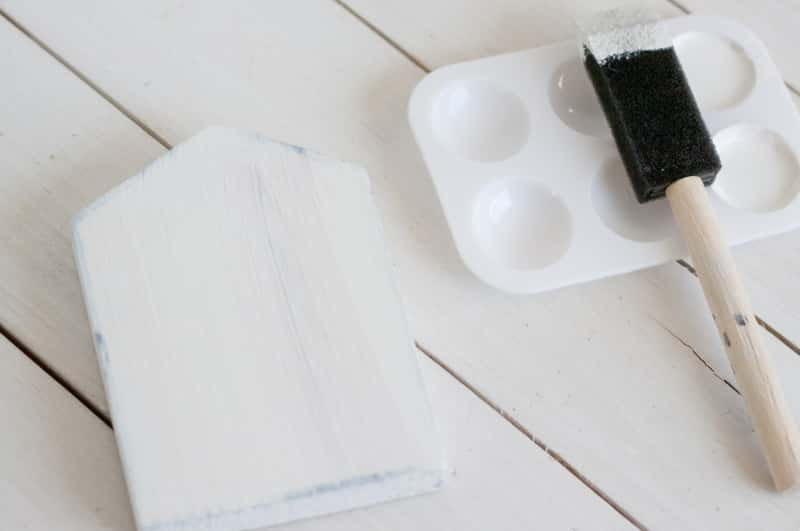
- Paint the entire wooden house with your white acrylic paint. Do as many coats as needed to completely cover the black edging. Let the paint dry completely between coats and after the final coat. (You can use a blow dryer if you’re impatient!)
- Once the paint has dried, start sanding the edges of the house until the black starts peeking through. Once you see black, be careful to not sand much more in that spot, you don’t want the black part to sand off!
How to make the jute wreath
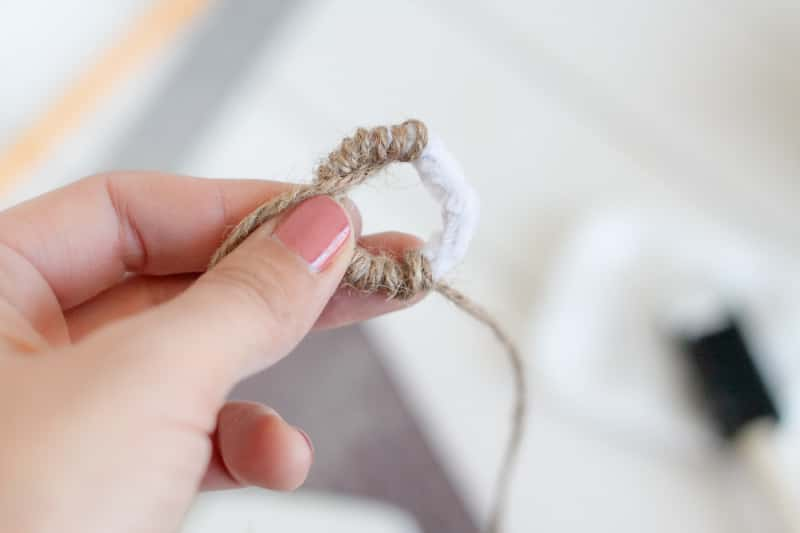
- For the jute wreath, take a white pipe cleaner and fold it in half. Then overlap the pipe cleaner and twist it around itself, making it into a 1- 1 ½” circle. Cut a long piece of jute and wrap it around and around the pipe cleaner until it’s completely covered. Trim off any excess jute and use hot glue to secure the ends down.
- Hot glue the wreath to the upper middle section of your wooden house.
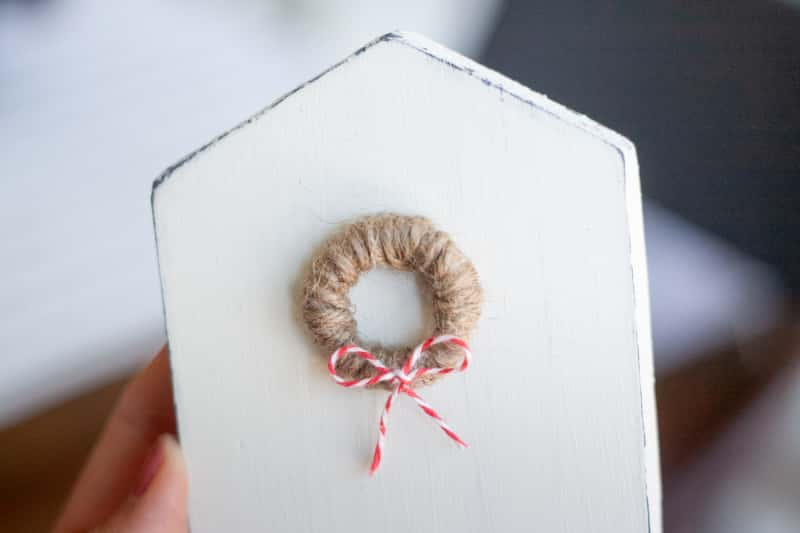
- Take a 5” piece of baker’s twine and tie it into a bow that’s a little bit smaller than the width of your wreath. Trim the ends to your desired length and hot glue it to the bottom middle of the wreath. Use a tiny bit of glue here, any extra sticks right to the wreath and will be gunky looking!
Small Wooden House Craft
Check out this easy small wooden house craft that's perfect for your mantle. Make your own small wooden house decoration with this tutorial.
Materials
- Pine lumber 1x6 (at least 5” long)
- Pencil
- Ruler
- Hand saw
- Sand paper
- Black permanent marker
- White acrylic paint
- Paint brush/foam brush
- Pipe cleaner
- Jute
- Baker’s twine
- Hot glue
Tools
- Hand saw
Instructions
- Mark out your house on the piece of pine using a ruler and a pencil. Start with a rectangle that’s 5” tall by 3.5” wide. On your top line, make a pencil mark at the halfway point (1.75” inches from edge) for the peak of your roof. On the sides, measure down 1” from the top and make a mark for the bottom edges of the roof. Draw a line from each of the edge roof marks to the peak mark. Once you have your house drawn out, use a hand saw to carefully cut it out.
- Use a black permanent marker to outline all of the edges of the wood house to make the darker edges when you sand the paint down.
- Paint the entire wooden house with your white acrylic paint. Do as many coats as needed to completely cover the black edging. Let the paint dry completely between coats and after the final coat. (You can use a blow dryer if you’re impatient!)
- Once the paint has dried, start sanding the edges of the house until the black starts peeking through. Once you see black, be careful to not sand much more in that spot, you don’t want the black part to sand off!
- For the jute wreath, take a white pipe cleaner and fold it in half. Then overlap the pipe cleaner and twist it around itself, making it into a 1- 1 ½” circle. Cut a long piece of jute and wrap it around and around the pipe cleaner until it’s completely covered. Trim off any excess jute and use hot glue to secure the ends down.
- Hot glue the wreath to the upper middle section of your wooden house.
- Take a 5” piece of baker’s twine and tie it into a bow that’s a little bit smaller than the width of your wreath. Trim the ends to your desired length and hot glue it to the bottom middle of the wreath. Use a tiny bit of glue here, any extra sticks right to the wreath and will be gunky looking!

Ellen is a busy mom of a 24-year-old son and 29-year-old daughter. She owns six blogs and is addicted to social media. She believes that it doesn’t have to be difficult to lead a healthy life. She shares simple healthy living tips to show busy women how to lead fulfilling lives. If you’d like to work together, email info@confessionsofanover-workedmom.com to chat.