
Last Updated on October 22, 2025 by Ellen Christian
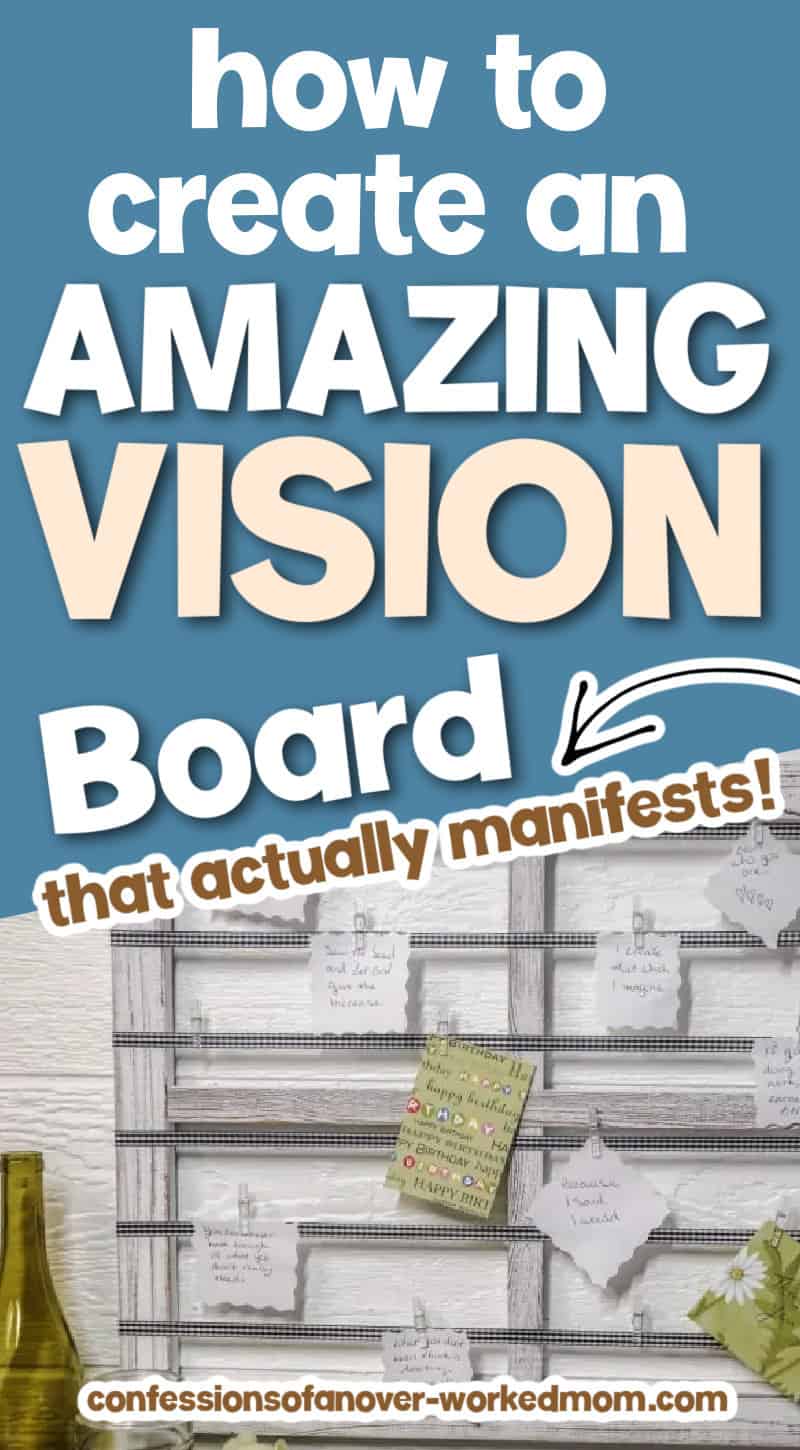
Have you ever wondered how to create a vision board that works? Check out this simple DIY vision board to help you focus on your goals.
Posts may be sponsored. This post contains affiliate links, which means I will make a commission at no extra cost to you should you click through and make a purchase. As an Amazon Associate I earn from qualifying purchases.
How To Create A Vision Board
Since I work at home, my day combines family and work responsibilities. I may be folding laundry while on a conference call with a client. I might answer emails on my iPad while my son uses my business computer for homework.
Unlike days when I worked in an office, my responsibilities sort of blur together some days. It’s easy to get off focus and find myself playing Candy Crush for a few too many minutes or working after dinner when I should be relaxing with my family.
To help me keep my mind on my goals and my attitude positive, I decided to create a vision board. A vision board is a visual reminder of your personal goals and the positive thoughts you want to focus on. Learning how to create a vision board is not difficult at all.
This vision board works to help me stay focused on my goals and allows me to achieve a good work lifestyle.
What is a vision board?
A vision board is a board on which you display images that represent your goals and dreams. Creating a vision board can help you achieve your goals by providing you with a daily reminder of what you want to achieve.
You can create a vision board by cutting out pictures from magazines or printing pictures from the internet. Once you have collected some pictures, glue them onto a piece of card or paper and display them where you will see them daily.
Some people like to create vision boards specific to one area of their life, such as their career or health. Others prefer to create a general board that includes all aspects of their life. Either way, choosing images that inspire and motivate you is important.
What to put on my vision board
If you’re not sure where to start, here are some ideas. You can use images or hand write inspirational quotes.
- Career: images of your dream job, successful people in your field, your ideal office
- Health: pictures of healthy foods, people exercising, quotes about wellness
- Relationships: photos of happy couples, inspiring love stories, friendship quotes
- Personal growth: images of people achieving their goals, quotes about self-improvement, your ideal life
Creating a vision board is a fun and easy way to visualize your goals. It’s also a powerful tool that can help you achieve them. So get started today and see what amazing things you can achieve!
What are the benefits of creating a vision board?
There are many benefits to creating a vision board. First, it can help you clarify your goals. When you take the time to sit down and choose images that represent your dreams, you’re forced to think about what you want to achieve. This can help you narrow your goals and determine what’s most important to you.
Second, a vision board can remind you daily of your goals. Seeing it every day will keep your goals at the top of your mind and help you stay focused on achieving them.
Third, creating a vision board can be a fun and creative way to get motivated. It’s a chance to let your imagination run wild and dream about all the possibilities for your life.
Fourth, making a vision board can help you tap into your subconscious mind. When you see images of what you want to achieve, your subconscious mind will start working on ways to make it happen.
Finally, vision boards can be a great way to get friends and family involved in your goals. Ask them to contribute pictures or quotes that inspire you. This will help you stay accountable and on track to achieve your goals.
What are some tips for creating a vision board?
Here are some tips to help you create a compelling vision board:
1. Start by brainstorming a list of goals and dreams. What do you want to achieve in the next year? In the next five years? Write down as many things as you can, no matter how big or small.
2. Once you have your list, start looking for pictures representing your goals. You can find pictures in magazines or online or print them out from your computer.
3. Once you have a good selection of pictures, start gluing them onto a piece of card or paper. Arrange them however you like – there’s no right or wrong way to do it.
4. Hang your vision board in a place where you’ll see it daily, such as your bedroom or office.
5. Take a few minutes each day to look at your vision board and focus on your goals. Imagine yourself achieving them and feel the emotions of success.
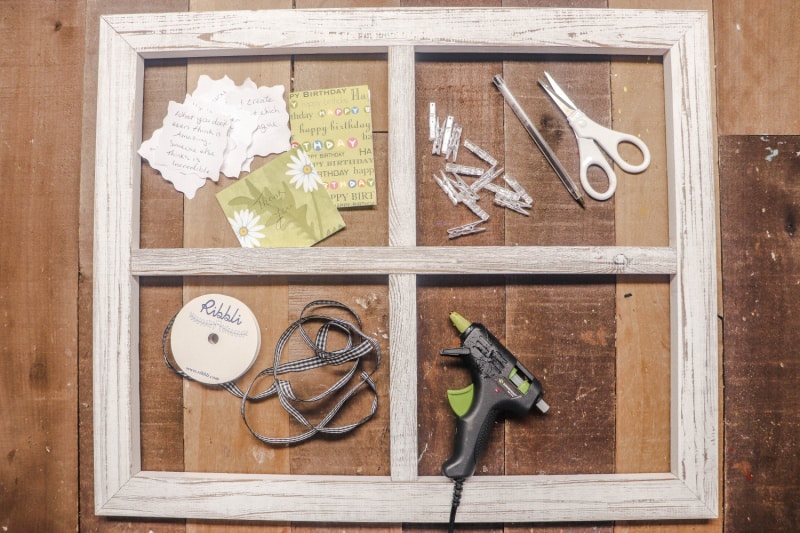
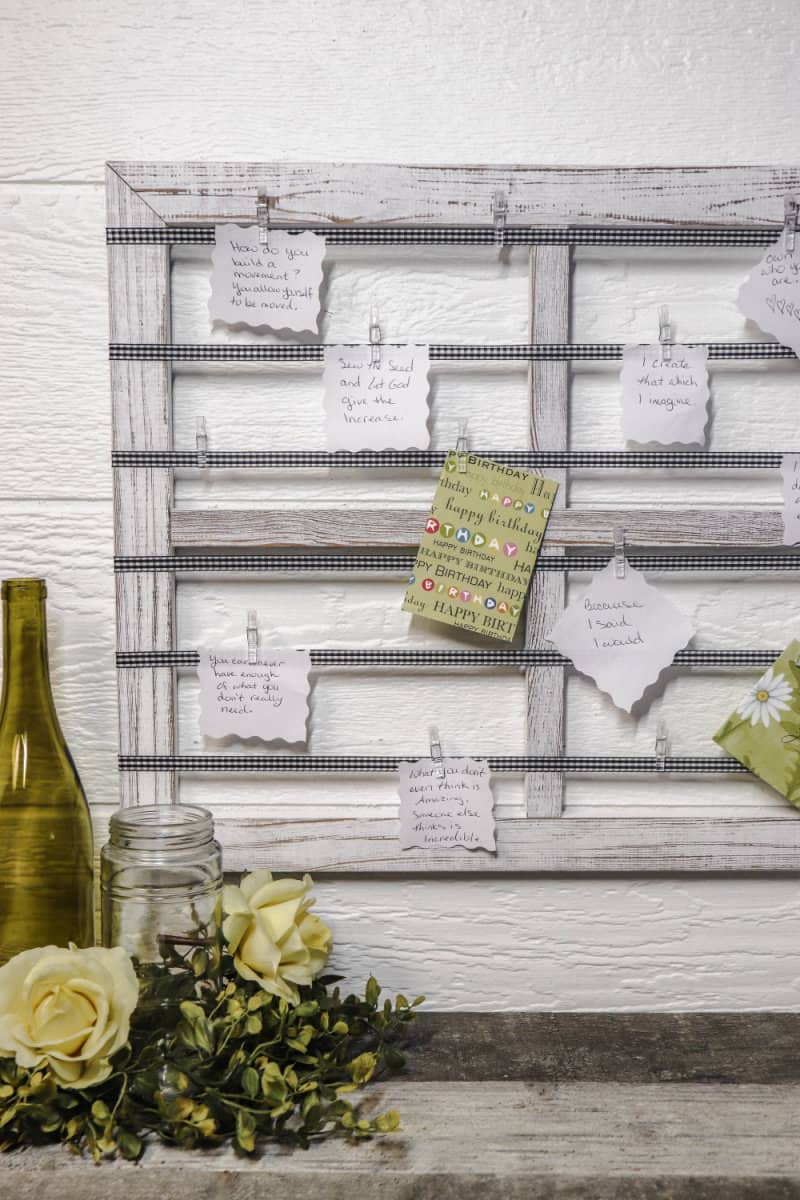
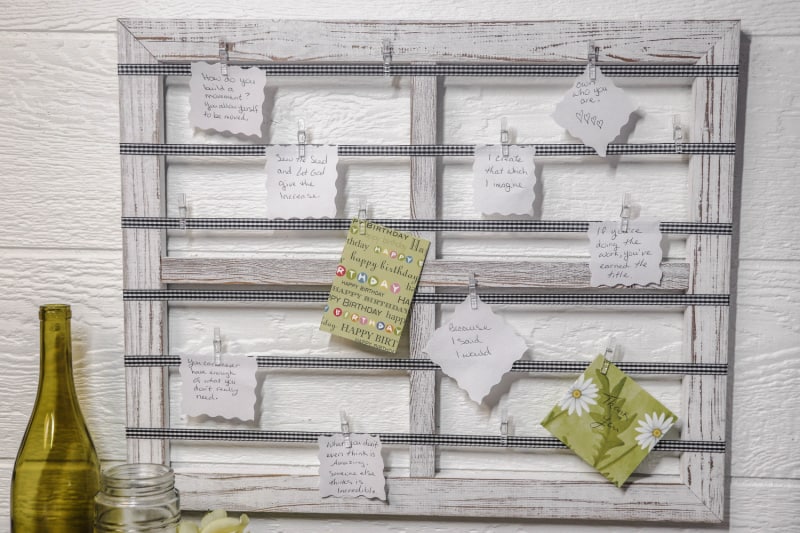
Materials
- Buffalo Check Ribbon 3/8”x10 yards
- Window Frame Wall Decor 18”x22” (includes hanging hardware for vertical or horizontal)
- Mini Clear Plastic Clips
- Hot glue gun
- Glue Gun Sticks
- Scissors
Instructions
- Gather supplies.
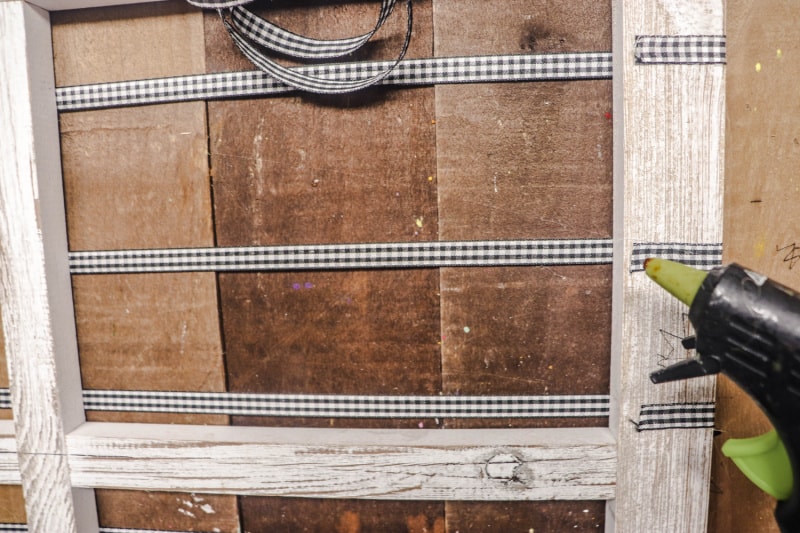
- Using hot glue gun, glue one end of buffalo check ribbon to the back of the frame near the top of the open area of the frame.
- Pull the ribbon tightly across the front of the frame and hot glue to the back, keeping the ribbon as even across the frame as possible. Cut the excess ribbon.
- Repeat this in a uniform spacing, so four lengths of ribbon are stretched across the front of the frame.
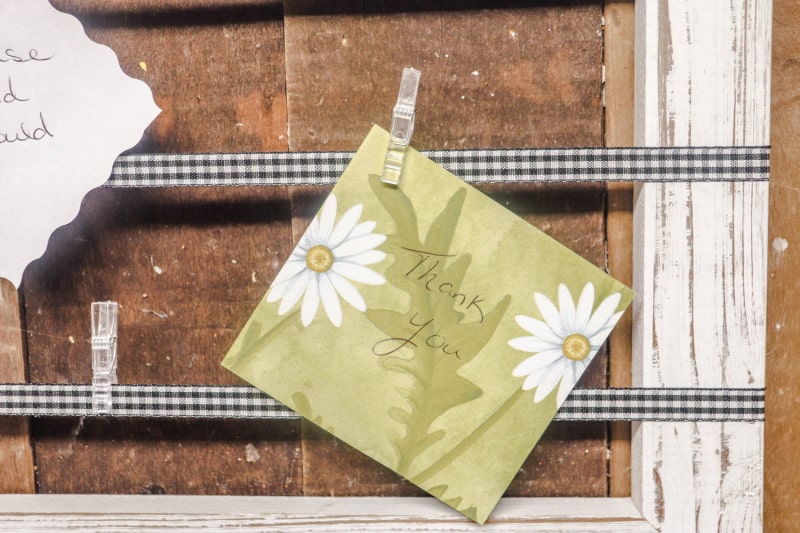
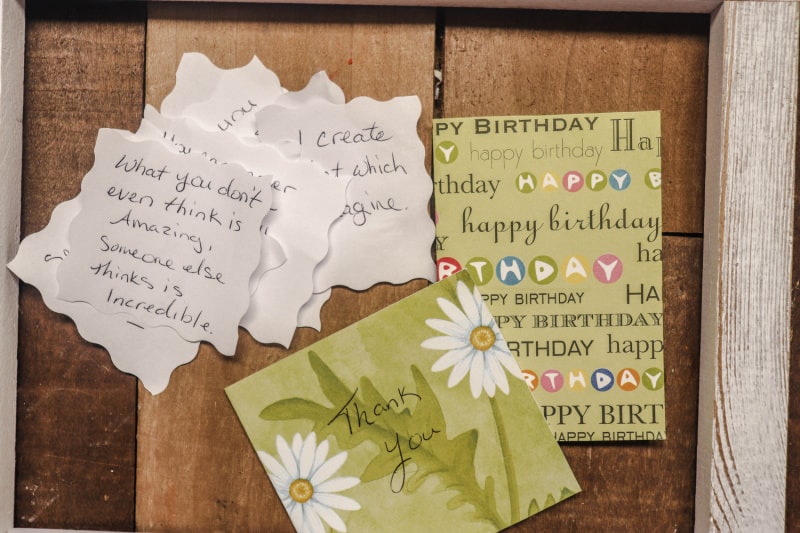
- Use the mini clear plastic clips to hang your favorite notes, cards, reminders, and affirmations.
- Hang in your office or bedroom.
This project was created in 2013 and was updated with new photos in 2022.
Related reading
How To Create A Vision Board That Works
Have you ever wondered how to create a vision board that works? Check out this simple DIY vision board to help you focus on your goals.
Materials
- Buffalo Check Ribbon 3/8”x10 yards
- Window Frame Wall Decor 18”x22” (includes hanging hardware for vertical or horizontal)
- Mini Clear Plastic Clips
- Hot glue gun
- Glue Gun Sticks
- Scissors
Tools
- scissors
Instructions
- Gather supplies.
- Using hot glue gun, glue one end of buffalo check ribbon to the back of the frame near the top of the open area of the frame.
- Pull the ribbon tightly across the front of the frame and hot glue to the back, keeping the ribbon as even across the frame as possible. Cut the excess ribbon.
- Repeat this in a uniform spacing, so four lengths of ribbon are stretched across the front of the frame.
- Use the mini clear plastic clips to hang your favorite notes, cards, reminders, and affirmations.
- Hang in your office or bedroom.

Ellen is a busy mom of a 24-year-old son and 29-year-old daughter. She owns six blogs and is addicted to social media. She believes that it doesn’t have to be difficult to lead a healthy life. She shares simple healthy living tips to show busy women how to lead fulfilling lives. If you’d like to work together, email info@confessionsofanover-workedmom.com to chat.
Nice idea, my children are big Vision board people and will enjoy your idea 🙂
Thanks so much for linking up week for week, I look forward to seeing what you share with us this week on Tutorial Thursdays Linky Party.
x
Natalie
Marigolds’ Loft
Thanks, Natalie! I’m working on a new craft now!
I love this! I so need one but don’t have time right now to make it. I love your ribbon and the punch you used. I’m so glad you joined us at Transformed Tuesday. Have a wonderful week.
Hugs,
Peggy~PJH Designs
Thanks, Peggy. It was lots of fun to make!
I’m a little obsessive – I have a vision board for each room in my house. Thanks for coming by and partying with me!
Robin
Fluster Buster
That’s fantastic! Great way to keep positive!
Love that board, a unique way to use a message board too, thank you for all those bath and body recipes too! they are awesome!
You’re welcome & glad you liked them!
wanted to invite you to my link party where we pin all those who join to our party board
http://myfashionforwardblog.com/2013/05/23/all-things-pretty-9/
Thanks for the invitation!
Love it! My daughter would love one of these too! I like that because it’s cork or foam, you can change it if you change your vision!
Very true! Great point!
Thanks, Rose! I’ve been meaning to make one for a while & the punch just worked perfectly!
Love the punch, I need to get some of those, they’re just not the cheapest supplies to buy if you know what I mean. But I’ve been eying a few! I’ve always wanted to create a vision board, I love how yours is filled with positive words and thoughts!
I have been meaning to make one of these for the longest time. I love what you did with the studded ribbon!
Thanks so much, Angela!
This looks great. I haven’t played Candy Crush but I do hear people saying they love it all of the time. 🙂
Thanks, Rosey! It helps keep me focused!
I live your punch.
I really love this punch. It’s so versatile!
How pretty – finally another reason to use my punch!!! ha/ha Pinned & Tweeted!!
LOL Jamie. Any reason is good to use your punch!
I have never seen a paper punch like that. cute project, very inspirational!
It’s definitely really neat. I love how big it is!
I love this! I am constantly multitasking and its so easy to lose focus on whats important! Great visual reminder of the things that really matter.
I’m hoping that it helps me keep the important things in mind!
I am sooo gonna make one of these! Thank you for the directions! 🙂
You’re welcome! Glad to share!