
Last Updated on February 15, 2024 by Ellen Christian
Looking for an easy way to make pressed leaves framed art? Learn how to make beautiful pressed leaves art with this simple DIY tutorial.
Posts may be sponsored. This post contains affiliate links, which means I will make a commission at no extra cost to you should you click through and make a purchase. As an Amazon Associate I earn from qualifying purchases.
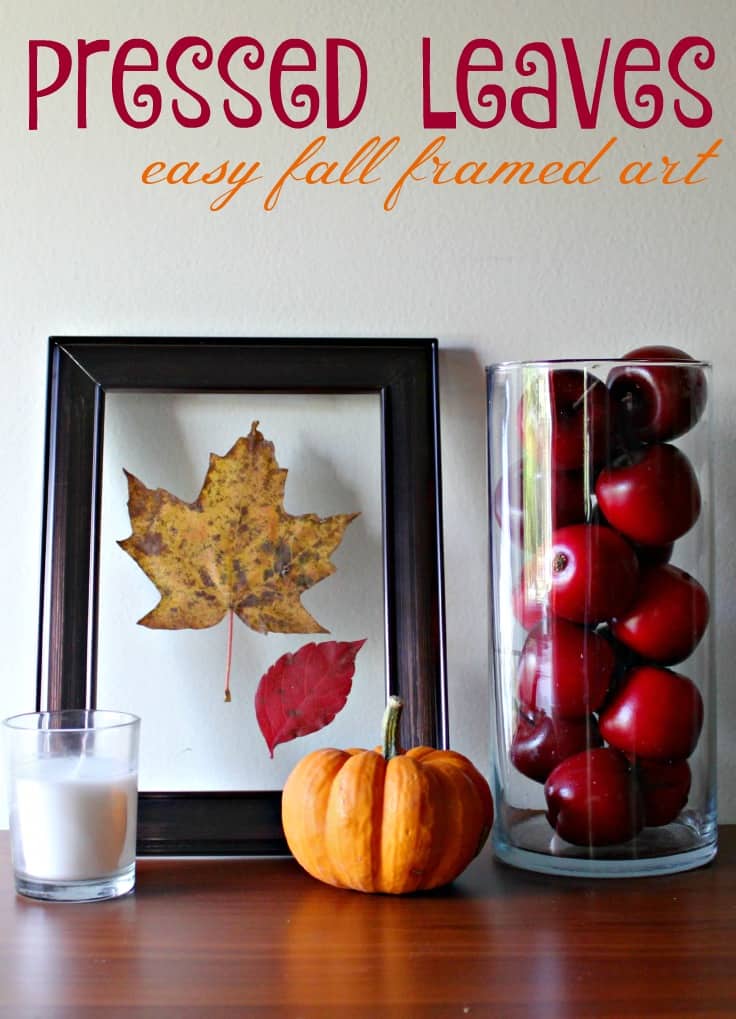
Pressed Leaves Framed Art
Wondering how to frame pressed leaves? This fall-framed art is so easy to do! I love the way pressed leaves look, but I don’t have the patience to wait while they press flat and dry.
I made an easy fall framed art project that uses pressed leaves that takes just 5 minutes or less to create.
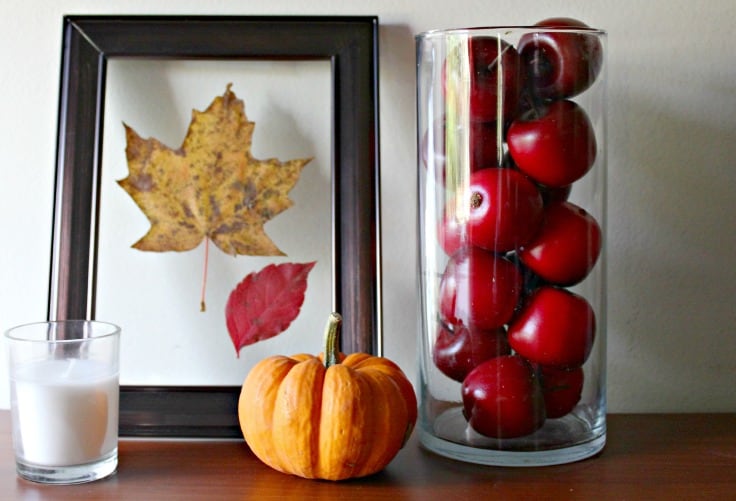
This fall framed art is very easy to make and very inexpensive. You may not need to buy any supplies at all depending on what you already have.
I used the fall framed art with a few other fall-themed items I already had but you could easily hang yours on the wall or display it alone.

Materials for pressed leaves framed art
- 2 leaves of alternating sizes and colors
- tape or glue
I had to buy two new picture frames since I didn’t have any that weren’t already being used. What I would recommend that you do is buy one “nice” picture frame that you will use to display your fall framed art and one “junk” picture frame that you can take apart for the extra piece of glass.
Or if you are one of those handy people, you can cut a piece of glass that will fit.
How do you frame pressed leaves?
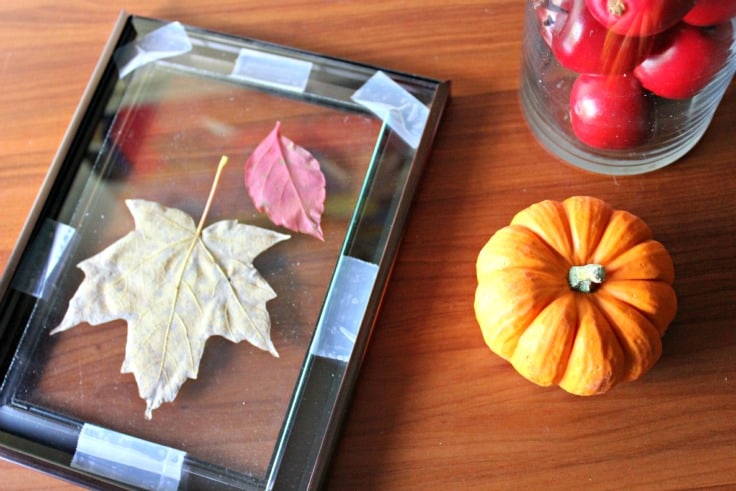
- Take apart the two picture frames.
- You will need the frame and glass from one frame and just the glass for the other.
- Set one frame face down with the glass in it.
- Place two leaves on the glass in whatever way looks nicest.
- Place the second piece of glass on the back and tape or glue it together.
How can I make them flat?
This takes a little bit of practice. If you want the back to be clear so it looks like the leaves float, you need to tape or glue it together so it doesn’t show through to the other side but still holds the leaves flat.
Use super glue if you want it permanent or want to hang your pressed leaves framed art on the wall. If you only want to lean it against something, you can use tape.
If you don’t care if the leaves appear to float or not, you can use a piece of white paper on the back and then the back of the picture frame to hold it together.
And, if you’re having a problem getting the leaves to lie flat, you need one of these.
How long do pressed leaves last?
Pressed leaves should last between 5 and 7 years if you keep them in a dry location. Try to avoid placing them in full sunlight.
Some leaves might fade sooner than others which will make your pressed leaves framed art look not as vibrant. Keep the area as dry as possible so that the leaves don’t rot.
So, if you’re wondering what to do with pressed leaves, I hope you’ll try this easy project. Why not learn how to paint with leaves next.
More fall decor ideas
If you enjoyed this pressed leaves framed art project, here are a few more ideas.
- Use Your Sense for Fall Decorating by Controlled Confusion
- Holiday Decorating by Champagne Living
- Faux Fall Decorating by Tools 2 Tiaras
- Decorate for Fall with Cricut by Life with Lisa
Pressed Leaves Framed Art
Looking for an easy way to make pressed leaves framed art? Learn how to make beautiful pressed leaves art with this simple DIY tutorial.
Materials
- 2 picture frames with glass
- 2 leaves of alternating sizes and colors
- tape or glue
Tools
- none
Instructions
- Take apart the two picture frames.
- You will need the frame and glass from one frame and just the glass for the other.
- Set one frame face down with the glass in it.
- Place two leaves on the glass in whatever way looks nicest.
- Place the second piece of glass on the back and tape or glue it together.

Ellen is a busy mom of a 24-year-old son and 29-year-old daughter. She owns six blogs and is addicted to social media. She believes that it doesn’t have to be difficult to lead a healthy life. She shares simple healthy living tips to show busy women how to lead fulfilling lives. If you’d like to work together, email info@confessionsofanover-workedmom.com to chat.
This is great! I love it- easy and quick yet looks like you spent a lot of time on it!
Thanks so much, Rachel!
I love leaves. I remember going to the cemetery when I was a kid, looking for certain leaves for a class. They always had the best trees! We used to press them between wax papers. I have tons of unused frames so this is a future project I can see me doing!
We did the same thing, Deb!
I love this idea.. simple yet very festive!
Thanks so much, Crissy!
What a great idea. I would never have thought of that…now I’m going to have to hit up Goodwill for frames!
Thanks, Lisa. Goodwill is a great place to start.