
Last Updated on February 27, 2024 by Ellen Christian
This easy 3D pumpkin fall craft is definitely simple fall craft that anyone can do in just a few minutes. All you need are a few simple paper craft supplies to get started.
Posts may be sponsored. This post contains affiliate links, which means I will make a commission at no extra cost to you should you click through and make a purchase. As an Amazon Associate I earn from qualifying purchases.
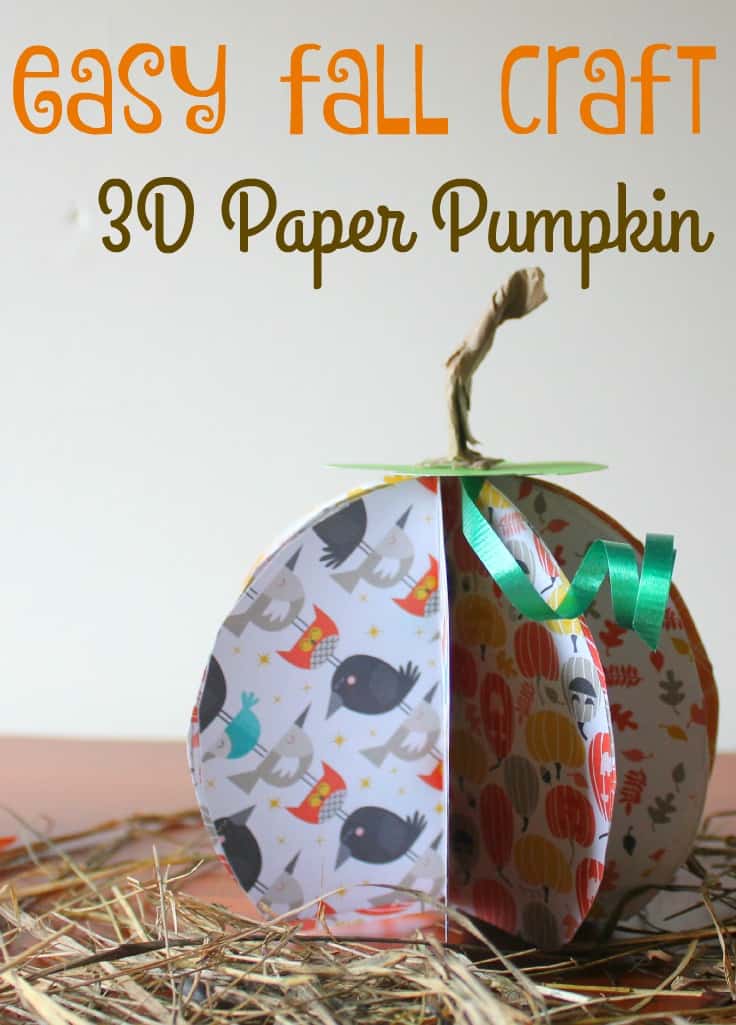
Easy 3D Pumpkin Fall Craft
I love crafting, but I don’t consider myself an expert crafter at all. It always amazes me that some of the crafts I find on Pinterest are labeled “easy” when they look way above my crafting ability. To me, easy is something I can do in just a few minutes without a bunch of specialized craft supplies that I probably don’t have.
You are all set if you have construction paper or scrapbook paper, scissors, and some glue. If you supervise, your child can even create their own 3D pumpkin fall craft with you.
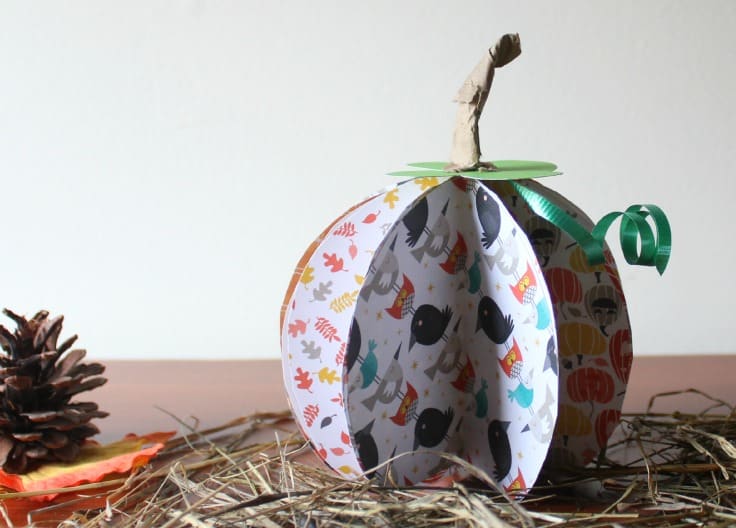
I created my 3D pumpkin using a variety of orange themed scrapbook cardstock paper, but you could easily do the same thing with construction paper if you prefer.
I love the way this 3d pumpkin came out using all sorts of different patterned papers. But, if you want to, you can use just orange paper for each section. You will still have the 3D effect. You just won’t have as many different patterns on each side.
Or, you can use only one or two patterns. It’s entirely up to you. You should be able to find quite a selection of papers at your local craft store. But, I linked to a few that I found on Amazon if you prefer to shop online.
What you need to make this craft
- Orange plain or patterned craft paper – all one type or a variety up to 12 pieces
- One piece of green plain or pattern craft paper
- Brown paper bag (optional) for the stem. You can cut one out of paper instead if you prefer.
- Green twirly ribbon (optional)
- Scissors
- Glue stick or tacky glue
3D pumpkin directions
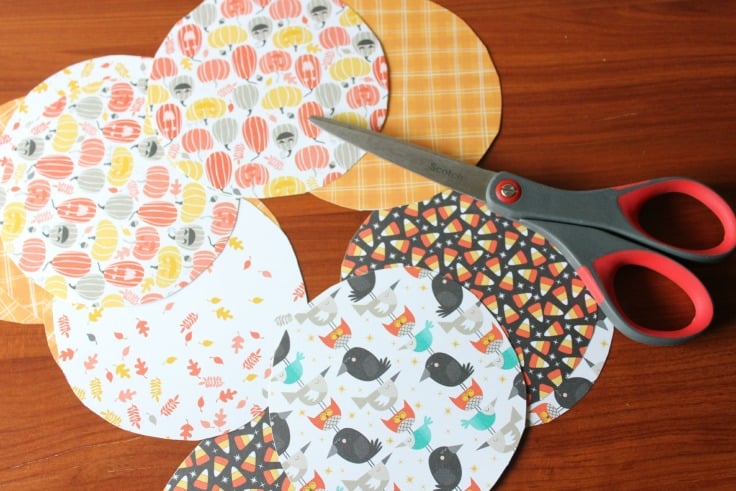
- Cut out a circle from a piece of cardboard to use as a pattern. Size doesn’t matter, whatever size fits in the area you want to decorate.
- Use that circle to trace 12 orange colored/patterned circles from your paper.
- Cut a bit off the bottom of the circles so they are flat on the bottom.
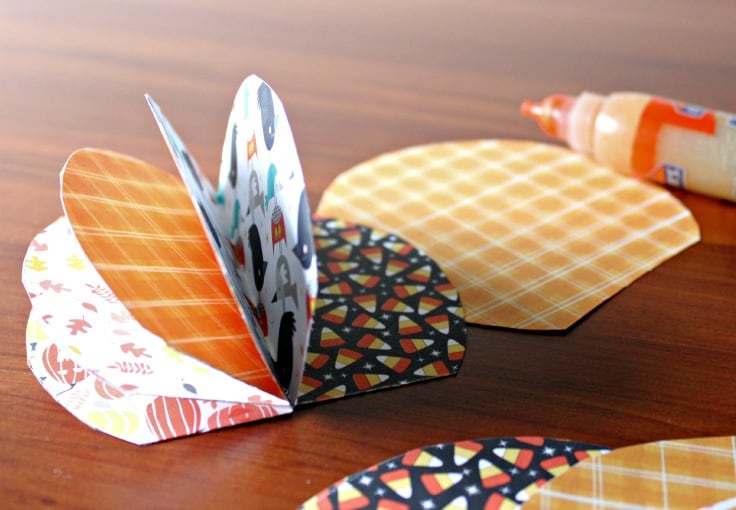
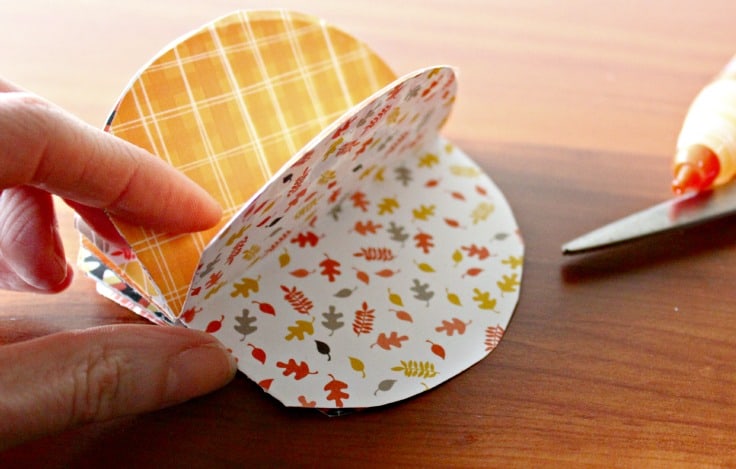
- Fold each circle in half and glue each half to another half until you have made a circle. Finish by gluing the two last halves together.
- Using the green cardstock or paper, cut out a piece that roughly looks like leaves.
- Tear a piece of brown paper bag and twist it to look like the stem of a pumpkin.
- Cut a short piece of green curling ribbon and curl.
- Glue the ribbon to the bottom of the leaves.
- Glue the stem to the top of the leaves.
- Finally, glue the bottom of the leaves to the top of the pumpkin.
 3D pumpkin craft template
You don’t need a template for this easy 3D pumpkin. All you need to do is to draw a circle. You can use the bottom of a glass, a cookie cutter, a small dessert plate. Or, use anything else in your home that is a circle about the same size you want for a finished product.
3D pumpkin craft for preschool
This craft is fairly simple to create. And, you should be able to have your elementary school-aged children do it on their own provided they have scissor skills. For a younger child, you might want to help them with the cutting.
If you want something that is easy enough for even a preschooler to make, why not try this craft. It’s a simpler version of the craft I made that should be able to be made by even a very young child especially if an adult helps out.
Kids will enjoy this Thanksgiving coloring page or this Halloween color by number. These Thanksgiving holiday bookmarks and Halloween printable bookmarks are fun to color too.

How to display this craft
I just scattered some hay, leaves, and pinecones around the pumpkin and left it at that. But, you can display it in any way you want to.
If you’ve been wondering how to make 3D paper pumpkins, I hope this helps. Enjoy! For more pumpkin crafts visit a few of my favorite bloggers:
- DIY Guide to Smashing Pumpkins
- 10 Steps to a Perfectly Carved Pumpkin
- Mason Jar Candle Tutorial
- How to Create Pumpkin Candles
Easy 3D Pumpkin Fall Craft
Materials
- Orange plain or patterned craft paper - all one type or a variety up to 12 pieces
- One piece of green plain or pattern craft paper
- Brown paper bag (optional) for the stem. You can cut one out of paper instead if you prefer.
- Green twirly ribbon (optional)
- Scissors
- Glue stick or tacky glue
Tools
- scissors
Instructions
- Cut out a circle from a piece of cardboard to use as a pattern. Size doesn’t matter, whatever size fits in the area you want to decorate.
- Use that circle to trace 12 orange colored/patterned circles from your paper.
- Cut a bit off the bottom of the circles so they are flat on the bottom.
- Fold each circle in half and glue each half to another half until you have made a circle. Finish by gluing the two last halves together.
- Using the green cardstock or paper, cut out a piece that roughly looks like leaves.
- Tear a piece of brown paper bag and twist it to look like the stem of a pumpkin.
- Cut a short piece of green curling ribbon and curl.
- Glue the ribbon to the bottom of the leaves.
- Glue the stem to the top of the leaves.
- Finally, glue the bottom of the leaves to the top of the pumpkin.

Ellen is a busy mom of a 24-year-old son and 29-year-old daughter. She owns six blogs and is addicted to social media. She believes that it doesn’t have to be difficult to lead a healthy life. She shares simple healthy living tips to show busy women how to lead fulfilling lives. If you’d like to work together, email info@confessionsofanover-workedmom.com to chat.
For once I have all the materials for this one, and pinned it to try soon. I save cool-looking papers, usually very colorful and those would be perfect for this piece of art! I’d love to make one for Breast Cancer Awareness and have tons of pretty pink papers from my mags for this.
Thanks, Deb. Hope you enjoy making it!
I love this! The best part is you can make them to match whatever decorations you have. I think I can do this LOL
You definitely could, Rachel!
Wow those are adorable and sound like they would be a fun craft for the kids!
It’s definitely easy enough for kids to do!