
Last Updated on October 15, 2026 by Ellen Christian
Insulation problems tend to stay out of sight until the first cold week of the season. A drafty bedroom or a cold stretch of floor can point to gaps in your home’s insulation. A furnace that runs longer than usual may be another sign of heat loss through the ceiling or walls.
Posts may be sponsored. This post contains affiliate links, which means I will make a commission at no extra cost to you should you click through and make a purchase. As an Amazon Associate I earn from qualifying purchases.
A simple home energy audit can help you identify potential problems before your heating bills increase. You don’t need specialized equipment to spot many common warning signs, although some areas are best left to professionals.
This guide explains how to check your home for insulation problems, what to look for in each area, and when to call an insulation contractor for help.
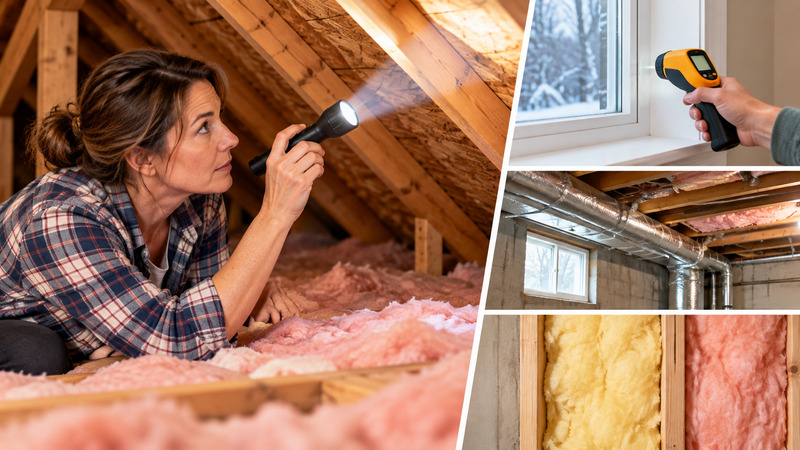
Why Insulation Problems Stay Hidden Until Winter
Insulation problems can develop gradually over the years. Fiberglass batts may sag away from the framing they once filled. A small roof leak can soak a section of insulation, reducing its effectiveness. An electrician or plumber may also move insulation during repairs without replacing it properly.
Air leaks around windows, doors, and other openings can contribute to uncomfortable rooms and higher heating costs.
Checking your home before winter gives you time to identify potential problems and schedule any necessary repairs before the coldest weather arrives.
Tools for a Simple DIY Home Energy Audit
You can complete a basic visual inspection with a few household items.
- A bright flashlight for checking dark corners and accessible attic spaces
- A phone to photograph potential problem areas
- A notebook to record drafts, cold spots, and other concerns
- A tape measure for accessible areas where insulation depth can be checked safely
- A thermometer to compare room temperatures
- Weatherstripping information or product labels from previous home improvements
You may also find an infrared thermometer helpful for identifying temperature differences. However, a cold surface does not automatically mean insulation is missing. Air leaks, moisture, and other conditions can cause similar readings.
Safety first: A homeowner energy audit should focus on areas you can inspect without disturbing insulation, touching wiring, or entering unsafe spaces. Leave electrical work, suspected asbestos, difficult attic access, and hazardous crawl spaces to qualified professionals.
Where Insulation Problems Tend to Show Up
A useful home energy audit starts with the areas most likely to experience heat loss.
Check the Attic for Insulation Gaps
Attics are one of the first places to check when evaluating home insulation.
If your attic has a safe, accessible opening, use a flashlight to look across the insulation without stepping onto unfinished ceiling surfaces.
Look for:
- Insulation that appears thin or uneven
- Areas where insulation has been moved aside
- Visible gaps around accessible framing
- Water stains or signs of a roof leak
- Dirty patches that may indicate air movement
- Missing or damaged insulation around the attic access hatch
If insulation is level with or below the tops of the attic floor joists, your home may benefit from additional insulation. However, the correct amount depends on the insulation material, existing depth, and your climate.
ENERGY STAR provides recommended insulation levels to help homeowners understand appropriate insulation values for their location.
Important attic safety precautions
Never step directly onto ceiling drywall or enter an unfinished attic without a safe walking surface designed to support your weight.
Older homes may contain vermiculite insulation, which can resemble small gray, brown, or gold-colored pebbles. Some vermiculite insulation contains asbestos. Do not disturb or collect samples of suspected vermiculite yourself.
Older electrical wiring, exposed connections, water damage, and signs of pests are additional reasons to stop the inspection and contact a qualified professional.
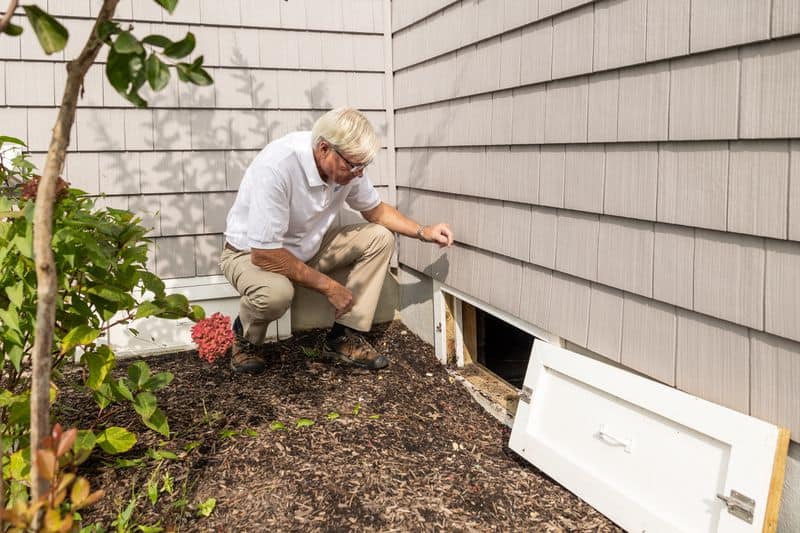
Look for Cold Spots in the Basement
Basements can reveal insulation and air-sealing problems that affect the comfort of the rooms above them.
Start by examining accessible areas along the foundation walls and rim joists. The rim joist is the band of framing located above the foundation where the floor structure meets the outside wall.
Look for:
- Visible gaps around pipes and utility openings
- Missing insulation along accessible framing
- Cold drafts near basement windows
- Water stains or damp surfaces
- Musty odors that may indicate moisture problems
- Uninsulated heating ducts in unconditioned spaces
Moisture problems should be addressed before adding insulation. Otherwise, insulation can trap moisture or conceal damage.
If your home has a crawl space, begin with a visual inspection from the access opening. Use a flashlight to look for standing water, damaged insulation, or signs of pests.
Avoid entering a crawl space with suspected mold, exposed electrical wiring, standing water, or other hazards. A qualified contractor can inspect areas that are difficult or unsafe to access.
Check Exterior Walls for Cold Spots
Wall insulation is more difficult to inspect because it is hidden behind drywall or other finished surfaces.
However, there are several clues that may indicate a problem.
Pay attention to rooms that feel noticeably colder than others, especially when the heating system is running normally.
You may also notice:
- Cold areas along exterior walls
- Drafts around electrical outlets or baseboards
- Uneven room temperatures
- Cold spots near windows
- Areas where previous plumbing or electrical repairs were completed
You can check for drafts around outlet cover plates without removing them. Do not insert tools into electrical boxes or attempt to probe wall cavities.
A professional energy assessor may use specialized equipment, including thermal imaging and blower door testing, to investigate insulation and air leakage problems that aren’t visible during a basic inspection.

Inspect Doors and Windows for Drafts
Not every cold spot comes from missing insulation. Small gaps around doors and windows can allow heated indoor air to escape and cold outdoor air to enter.
On a cold or windy day, carefully check around:
- Exterior door frames
- Window trim and sashes
- Door thresholds
- Baseboards along exterior walls
- Accessible plumbing penetrations
- Attic access panels
You may be able to feel drafts with your hand or notice daylight around a poorly sealed door.
Look for worn weatherstripping, cracked caulk, or gaps where trim meets the wall.
Avoid using open flames or smoke-producing materials to locate drafts. Also, do not run multiple exhaust fans to depressurize your home as a DIY test, particularly if you have fuel-burning appliances. Improper depressurization can create combustion safety hazards.
For a more complete air leakage evaluation, consider scheduling a professional home energy assessment.
Don’t Overlook the Attic Hatch
The attic access hatch is a frequently overlooked source of heat loss.
If the hatch is located in a heated hallway or bedroom, check whether it closes tightly and has appropriate insulation.
Look for visible gaps around the edges or signs that the existing weatherstripping is worn.
An insulation professional can recommend suitable improvements without interfering with safe attic access.
How to Record Your Home Energy Audit Findings
Taking notes during your inspection makes it easier to prioritize repairs.
Create a simple list of the areas you checked and assign each one a category.
No obvious concerns: Areas where insulation appears intact and you haven’t noticed drafts or moisture.
Worth monitoring: Minor temperature differences, small drafts, or areas where insulation coverage is uncertain.
Needs professional attention: Suspected asbestos, outdated or exposed wiring, water damage, mold, significant insulation gaps, or areas that cannot be inspected safely.
Photograph accessible problem areas so you can compare them after repairs or share them with a contractor.
Remember that a visual inspection cannot confirm whether insulation meets recommended performance levels. It is a starting point for deciding whether a more detailed assessment is worthwhile.
When to Call a Professional Insulation Contractor
Some insulation improvements are straightforward, but others require specialized equipment, training, and safety precautions.
Consider professional help when:
- Your attic has difficult or unsafe access
- You suspect asbestos-containing insulation
- Insulation has been damaged by water or pests
- Your home has older electrical wiring
- Several rooms remain uncomfortable despite normal heating
- You want to add insulation inside finished walls
- You need help evaluating crawl space moisture or insulation
- You aren’t sure how much insulation your home needs
A professional assessment can help identify whether your home needs additional insulation, air sealing, moisture repairs, or a combination of improvements.
For example, companies offering professional insulation services may provide attic insulation, wall insulation, crawl space improvements, and air-sealing solutions.
Before hiring a contractor, compare written estimates, ask about insurance and relevant qualifications, and confirm which services are included.
You can also ask whether local utility companies or state energy efficiency programs offer rebates or incentives for home insulation improvements.
Make a Home Energy Audit Part of Your Fall Maintenance Routine
Your home’s insulation and air sealing can change over time. Seasonal temperature changes, home repairs, moisture, and ordinary wear may create new problems.
A quick inspection each fall can help you identify issues before winter.
Keep photographs and notes from previous years so you can recognize changes.
It’s also worth checking for new drafts after roof repairs, electrical work, plumbing projects, or other renovations that may affect insulation.
Along with checking your insulation, follow these fall home maintenance tips to help protect your house and prepare for colder weather.
Start With the Areas You Can Check Safely
A DIY home energy audit doesn’t need to be complicated. Begin with accessible areas, look for drafts and visible insulation problems, and record anything that deserves a closer inspection.
Pay particular attention to your attic, basement, exterior walls, doors, and windows.
While some small weatherstripping or caulking projects may be manageable for homeowners, hazardous or concealed insulation problems require professional attention.
Finding problems early gives you more time to plan repairs, improve comfort, and prepare your home for colder weather.

Ellen is a busy mom of a 29-year-old son and 33-year-old daughter. She owns nine blogs and is addicted to social media. She believes that it doesn’t have to be difficult to lead a healthy life. She shares simple healthy living tips to show busy women how to lead fulfilling lives. If you’d like to work together, email info@confessionsofanover-workedmom.com to chat.
