
Last Updated on October 15, 2023 by Ellen Christian
Looking for quilled Valentine’s Day cards? Check out this quilling Valentine cat card I made and make your own homemade card today.
Posts may be sponsored. This post contains affiliate links, which means I will make a commission at no extra cost to you should you click through and make a purchase. As an Amazon Associate I earn from qualifying purchases.
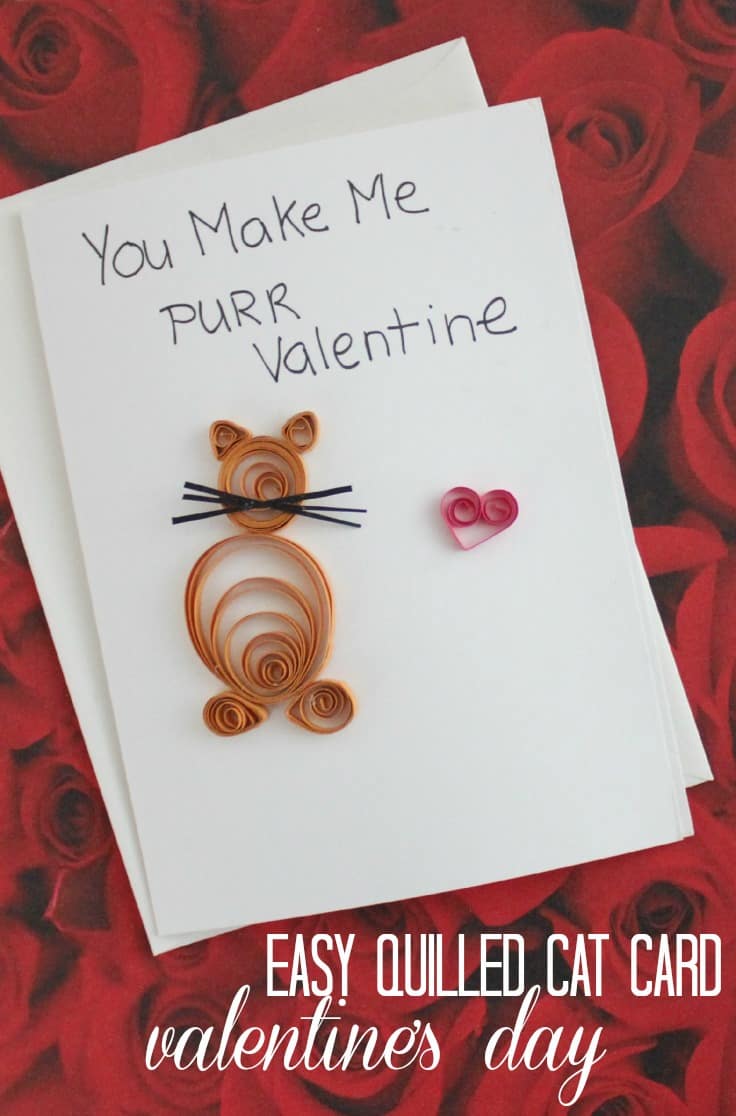
Cat Quilling Valentines Day Card
Check out this cute cat quilling Valentine’s Day card! I’ve been searching for a unique Valentine’s Day card for Marty for Valentine’s Day. I’m not a huge fan of store-bought cards most of the time.
I really like cards that I make myself because they are more unique and one of a kind. Every year, I try to think of something different to make him. In the past, I made him a Valentine’s Day card using the teabag folding technique.
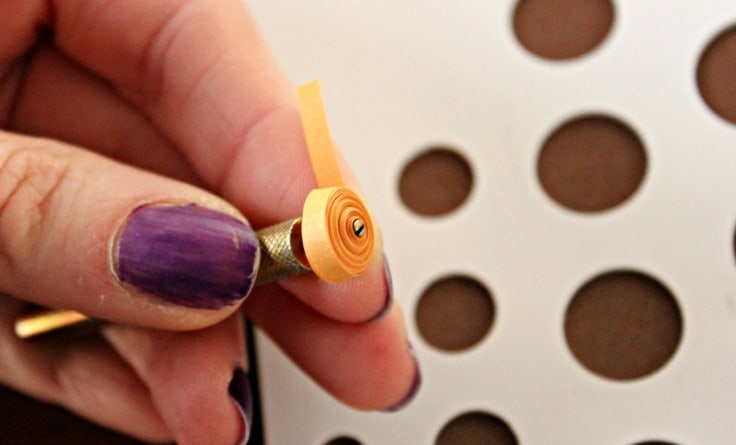
Since Marty loves cats, I thought that making a Cat Quilling Valentines Day Card would be perfect for him. I started quilling a few years ago and it’s a fun, relatively easy way to make a variety of different shapes out of colored strips of paper.
While it takes a little bit of practice, it’s a fairly easy craft to master.

Supplies to make this project
- Blank notecard with matching envelope
- Various sizes of card stock to create layers (optional).
- Quilling strips in a cat color (brown, black, white, orange, grey)
- Glue
- Markers or pens to write with.
Cat quilling card directions
So, making this quilled Valentine’s Day card is fairly simple. Get started by doing the cat quilling part first.
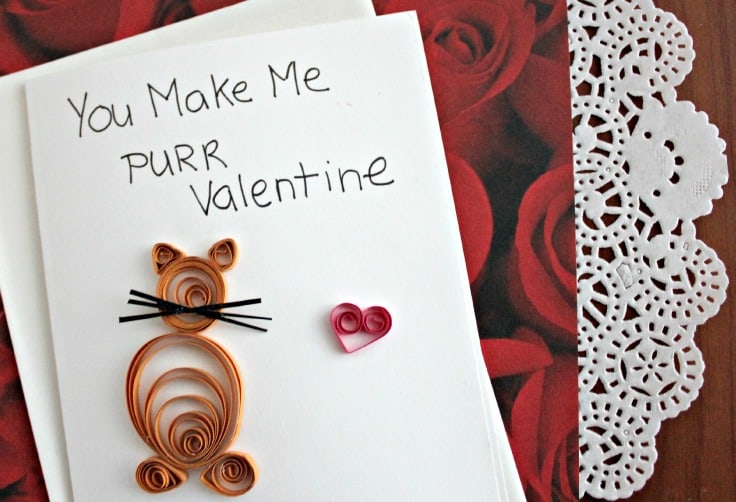
- Create one large quilled circle and pinch ends slightly to make it oval-shaped. Glue shut. This is the cat’s body.
- Create a medium quilled circle in the same color and glue shut. This is the cat’s head.
- Create two small quilled circles in the same color and glue shut. These are the cat’s feet.
- Create two very small quilled circles in the same color and glue shut. These are the cat’s ears.
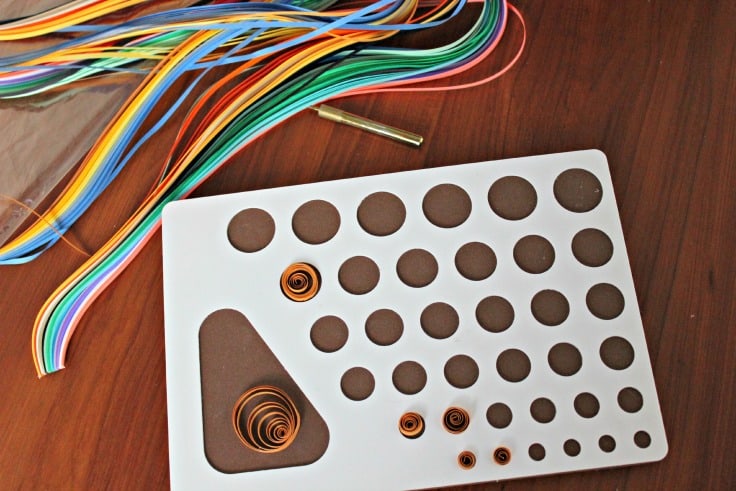
- Let all of these pieces dry completely.
- Next, very carefully, glue the body and head to your notecard.
- Pinch the ends of the feet and ears slightly to get them in the right shape. Glue if necessary to hold together. Glue onto the cat’s body on your notecard.
- Cut 6 small strips for whiskers. You can use the same color or you can use black or white. Glue them to the cat’s face.
- Quill a strip of paper in the same color as the body and let out one end while gluing the other end. This is the cat’s tail. Attach to the body.
- Allow it to dry completely.
- You can add layers to your notecard with other pieces of card stock or simply leave it one color.
Finishing touches to your card
- Write your verse. For a child or friend, you could use “You are Purr-fect Valentine.” For a romantic partner, you could use “You make me Purr Valentine.”
- Finally, you can add a simple quilled red heart to the card by taking one strip of red quilling paper and rolling it in half. Then curl each side in and glue.
I hope you have a chance to make this cat quilling Valentine’s Day card!
Finally, if you enjoy handmade quilling cards, you might want to try these:

Ellen is a busy mom of a 24-year-old son and 29-year-old daughter. She owns six blogs and is addicted to social media. She believes that it doesn’t have to be difficult to lead a healthy life. She shares simple healthy living tips to show busy women how to lead fulfilling lives. If you’d like to work together, email info@confessionsofanover-workedmom.com to chat.
This fascinated me, I had not heard of Quilling but I may need to learn a new craft I think. Had to add this as a bonus feature for Happiness is Homemade this week Thanks for joining
Thank you! So glad you enjoyed it!
Really cute cat quilling for valentines card. Nice idea!
Thanks, Alexis!
Love this! Pinned to explore it more later this weekend!
Thank you, Deb!
That is adorable! I have always loved the look of quilling and want to try it someday! You made it look quite easy!
Thanks, Dawn. It’s really easy to do the smaller projects.Some day I want to try something more detailed.
This is so cool! I’ve never known how it was done though. What a cute little kitty! Aww.
Thanks, Leslie! it’s fun to do.
I have my quilling kit on my desk and still have never used it. So need to try to get with it soon!! Love the card!! Sharing it!
I really love quilling but don’t have anywhere near enough time to do it as often as I’d like.