
Last Updated on August 3, 2022 by Ellen Christian
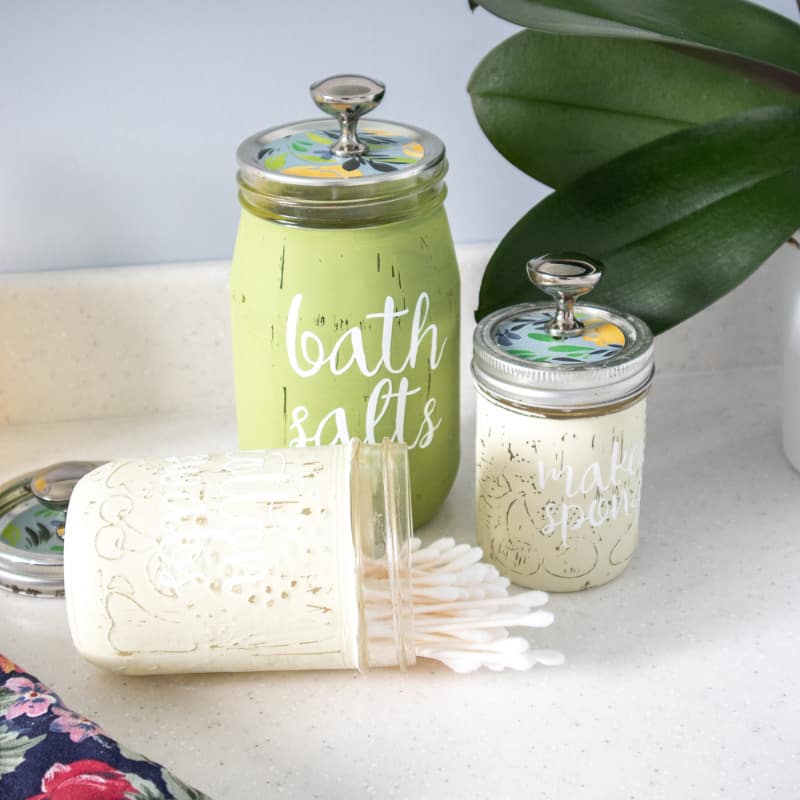
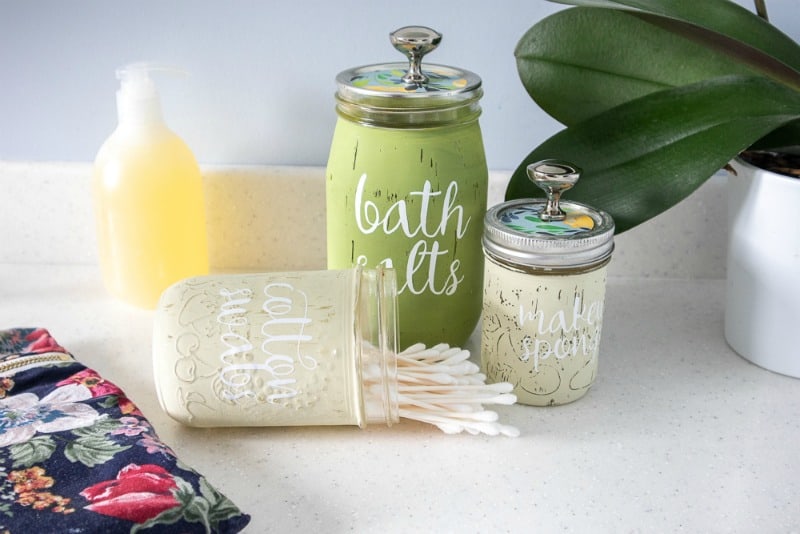
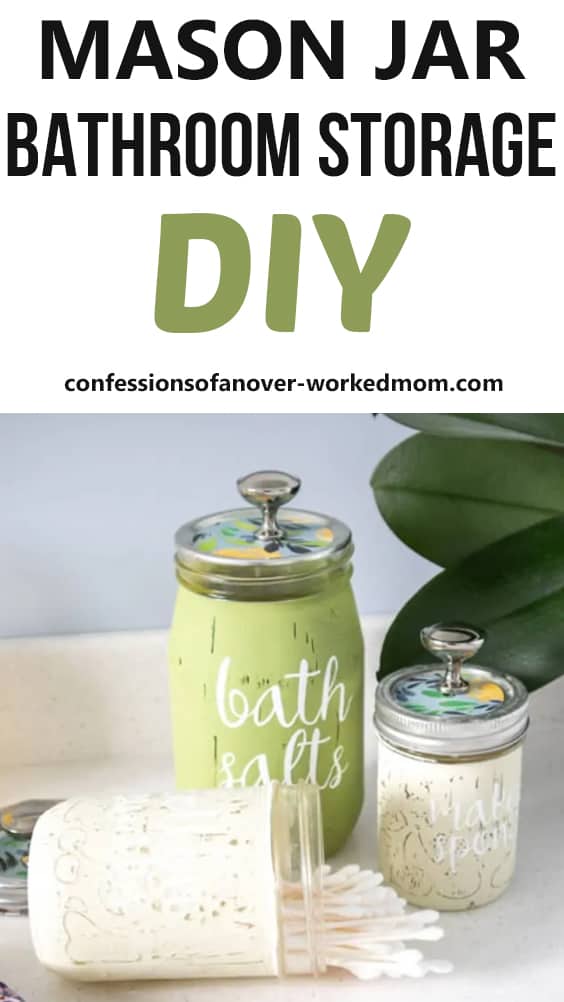
This Mason Jar bathroom storage DIY is a simple way to dress up your bathroom and give you a little bit more storage room. Mason Jar crafts are one of my favorites because they use up something that I already have so many of.
Posts may be sponsored. This post contains affiliate links, which means I will make a commission at no extra cost to you should you click through and make a purchase. As an Amazon Associate I earn from qualifying purchases.
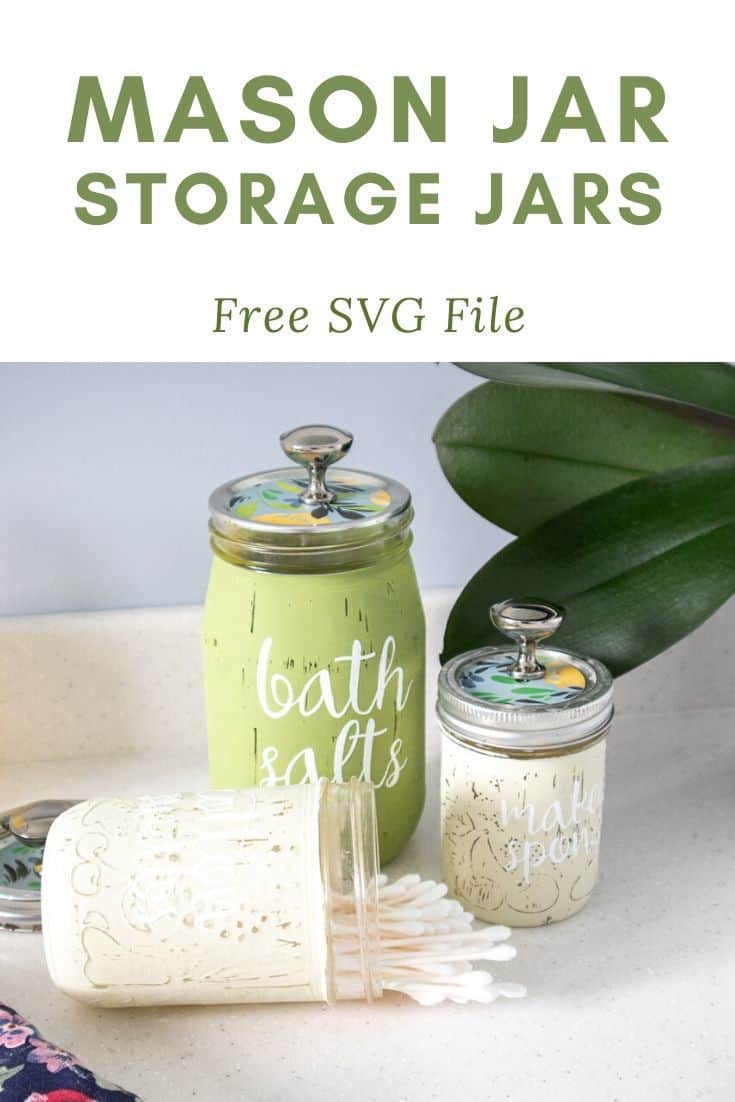
Mason Jar Bathroom Storage DIY
You will need a Cricut Maker or Cricut Joy with a fine point blade for this Mason Jar bathroom storage DIY. That is how you print out the labels that you’ll use.
These Mason Jars are painted and then distressed. I’ve seen similar sets on Etsy for tons of money. But, it’s easy enough to make your own for a lot less.
These Mason Jars are painted with chalky paint. If you’re going to use them for storage in the bathroom, you will want to add a top clear coat to give them a little bit of added durability. If you’re just using them as decor, you won’t need to do that since you won’t be handling them daily.

What can you put in Mason Jars?
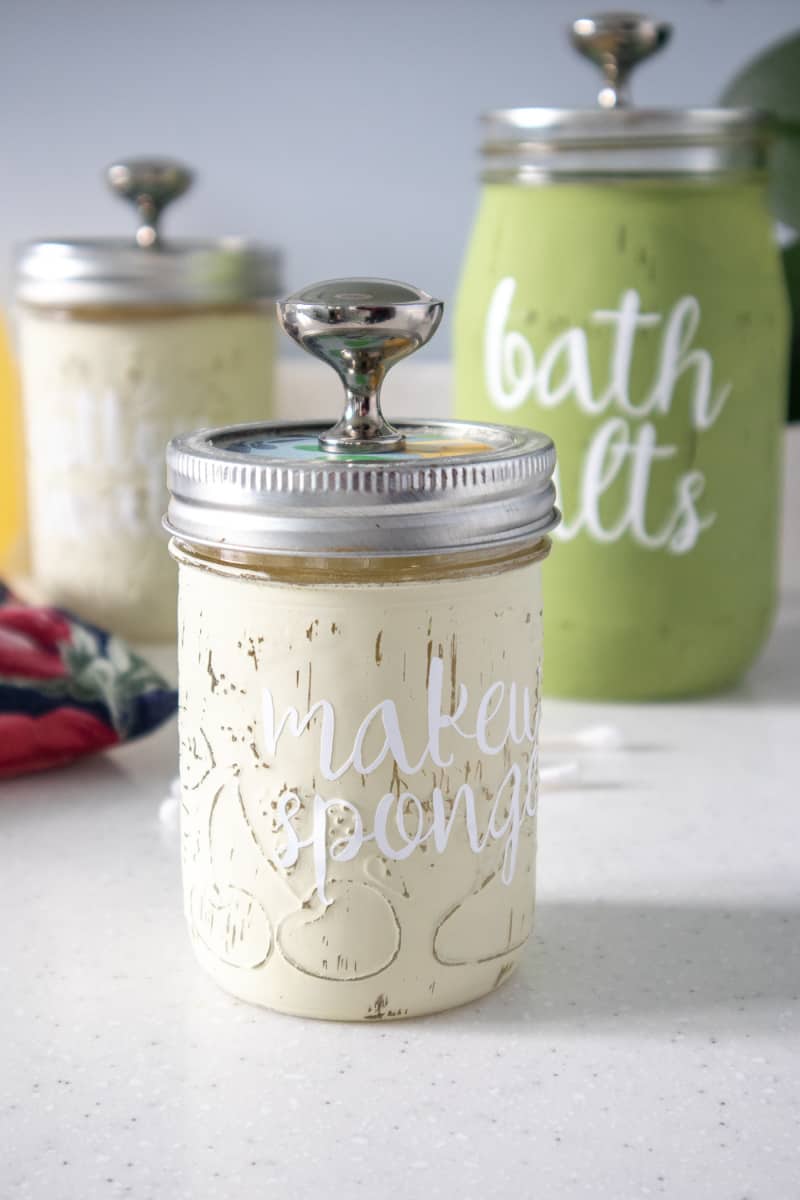
When it comes to this Mason Jar Bathroom Storage DIY, you can put cotton swabs, cotton balls, makeup rounds, makeup brushes, toothbrushes, and lots more in them.
And, you can easily use them to store your favorite bath salts whether you make them from scratch or buy them at the store. It really all depends on what type of lid you put on it.
If you’re wondering how to make a Mason Jar toothbrush holder, simply use a rim and not a lid around the top. Then you can add your toothbrushes without a problem.
Grab a Cricut and your accessories right here.
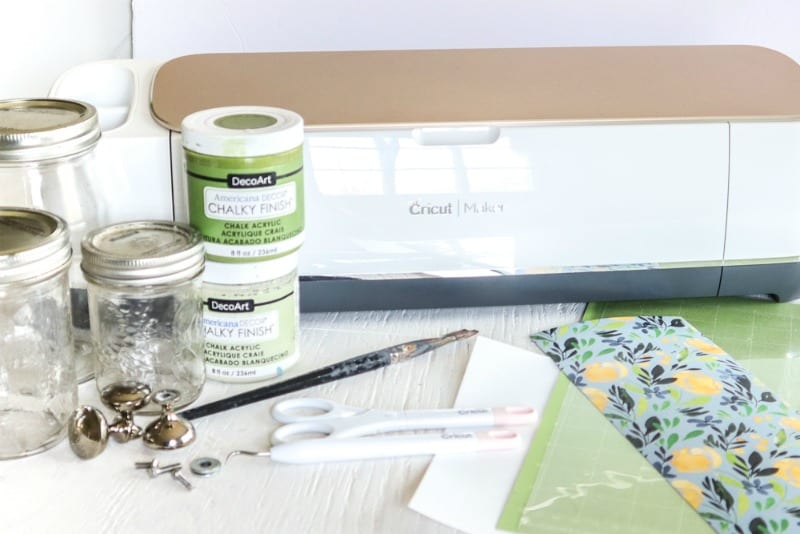
Mason Jar Bathroom Storage Supplies
This is what you need to make this Mason Jar bathroom storage DIY project.
- Bathroom Canister SVG File (scroll down to download)
- Cricut Maker (or Cricut Joy) with Fine Point Blade
- Standard grip mat
- Cricut Premium Vinyl, Removable (White) or Permanent in the color of your choice
- Cricut Adhesive-Backed Deluxe Paper, Natalie Maran in the Grove
- Package of Cricut Transfer Tape
- Mason Jars with lids, 8oz and 16oz
- Scissors
- Weeder tool
- Americana Chalky Finish in Refreshing and New Life
- Fine Grit Sandpaper, 200 grit
- Paintbrush
- Hot glue gun with clear glue sticks
- Decorative knobs with screws and suitably sized washers
- Drill and drill bit
Bathroom Mason Jar Storage DIY directions
- Gather supplies.
- Thoroughly wash jars with soap and hot water and let them dry completely before using.
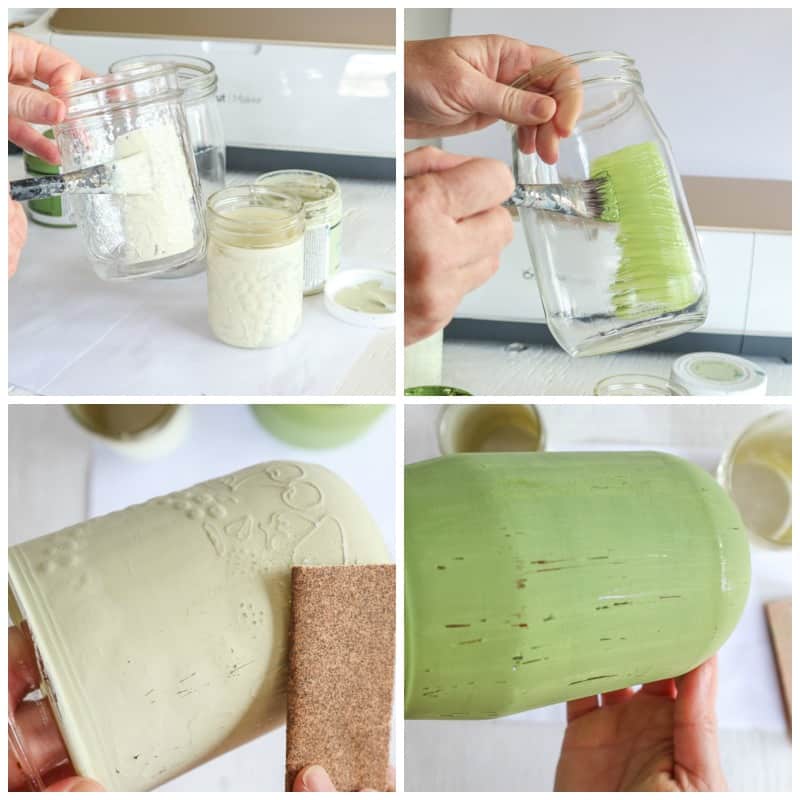
Preparing the Mason Jars
- Apply a thin coat of chalky finish paint to each of the mason jars leaving the neck of the jars unpainted.
- Put aside to dry fully and repeat with additional coverage as needed.
- Once dry, distress the chalky paint using a piece of soft grit sandpaper to gently sand the surface of the mason jars moving your hand around the jar in one direction.
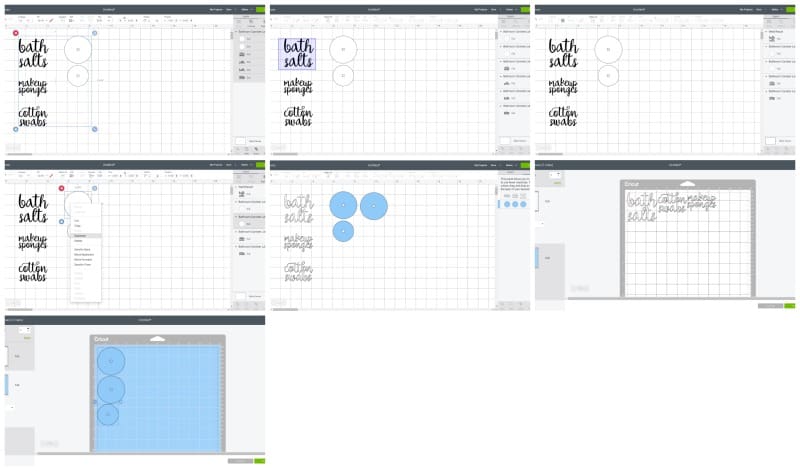
Uploading the SVG Pattern
- Upload the Bathroom Canister SVG File into Design Space.
- Click Ungroup.
- Click and drag over the “bath salts” phrase and with the image highlighted, click on the Weld button.
- Adjust phrase sizes to fit mason jars accordingly. The “bath salts” phrase is sized to 2.75” high on the Design Space canvas to fit a 16 oz jar. The “cotton swabs” phrase sized to 2.75” wide and the “makeup sponges” phrase sized to 2.75” wide.
- The circle shapes are for cutting the adhesive-backed cardstock for the mason jar lid toppers. Measure the size of your lids to ensure these templates will fit. Duplicate or adjust the circle shapes as needed to fit your lids.
- Color sync the images if needed to match the color of the material.
Cutting
Mason Jar Bathroom Storage DIY cutting directions.
- Select “Make It” in Design Space.
- For cutting phrases, set the material type to Premium Vinyl.
- Follow prompts for loading the mat into the Cricut Maker or Cricut Joy and cutting the Premium Vinyl. When prompted, unload the mat from the cutting machine.
- Remove the Premium Vinyl from the mat.
- For cutting the lid toppers, set the material type to Cardstock with adhesive backing.
- Follow prompts for loading the mat into the Cricut Maker or Cricut Joy and cutting the toppers. When prompted, unload the mat from the cutting machine.
- Remove the adhesive-backed cardstock from the mat.
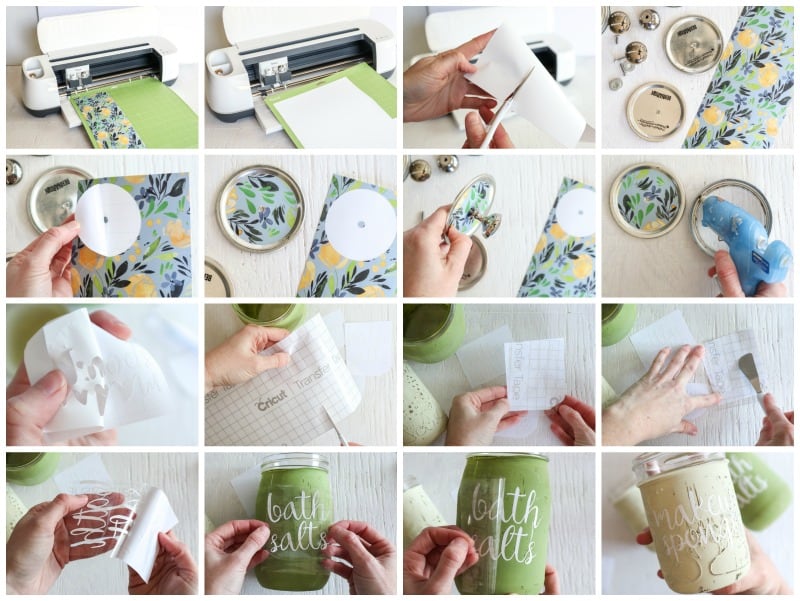
How to Assemble the Jars
Follow these directions to assemble the jars for this Mason Jar Bathroom Storage DIY.
- Cut around each image with a pair of scissors.
- Using the weeding tool, peel away the excess vinyl around the cut images and discard.
- Cut a piece of transfer tape a bit larger than the size of the image.
- Peel away the transfer tape backing and place the transfer tape over the top of the cut image. Gently rub the vinyl to help it stick to the transfer tape.
- Peel away the vinyl backing, leaving just the image adhered to the transfer tape.
- Position the phrase with the transfer tape on to the smooth side of a jar and press in place.
- Press the vinyl phrase down with your fingers to help it to stick to the painted glass jar.
- Slowly and carefully remove the transfer tape leaving the vinyl image on the jar.
- Repeat for the other mason jars and phrases.
How to Assemble the Jar Lids
This is how to assemble the lids for this Mason Jar Bathroom Storage DIY.
- Drill one hole the same size at the screw size for the knob through the center of the mason jar lid. Take extra care when handling sharp metal edges.
- Peel off one of the cardstock circles from the backing and place over the top of the mason jar lid.
- If the lid is in two parts, glue them together using a hot glue gun with clear glue sticks.
- Screw the decorative knob onto the mason jar lid.
- Repeat with the remaining lids.
- To finish, fill the containers with your bathroom essentials.
More Mason Jar crafts
Did you like this Mason Jar Bathroom Storage DIY? You may like this.
Mason Jar Bathroom Storage DIY
Mason Jar Bathroom Storage DIY
Materials
- -Bathroom Canister SVG File
- -Cricut Maker (or Cricut Joy) with Fine Point Blade
- -Standard grip mat
- -Cricut Premium Vinyl, Removable (White) or Permanent in the color of your choice
- -Cricut Adhesive-Backed Deluxe Paper, Natalie Maran in the Grove
- Package of -Cricut Transfer Tape
- -Mason Jars with lids, 8oz and 16oz
- -Scissors
- -Weeder tool
- -Americana Chalky Finish in Refreshing and New Life
- -Fine Grit Sandpaper, 200 grit
- -Paintbrush
- -Hot glue gun with clear glue sticks
- -Decorative knobs with screws and suitably sized washers
- -Drill and drill bit
Tools
- Cricut Maker (or Cricut Joy) with Fine Point Blade
Instructions
Instructions:
- Gather supplies.
- Thoroughly wash jars with soap and hot water and let them dry completely before using.
Preparing the Mason Jars
- Apply a thin coat of chalky finish paint to each of the mason jars leaving the neck of the jars unpainted. Put aside to dry fully and repeat with additional coverage as needed.
- Once dry, distress the chalky paint using a piece of soft grit sandpaper to gently sand the surface of the mason jars moving your hand around the jar in one direction.
Uploading the SVG Pattern
- Upload the Bathroom Canister SVG File into Design Space.
- Click Ungroup.
- Click and drag over the “bath salts” phrase and with the image highlighted, click on the Weld button.
- Adjust phrase sizes to fit mason jars accordingly. The “bath salts” phrase is sized to 2.75” high on the Design Space canvas to fit a 16 oz jar. The “cotton swabs” phrase sized to 2.75” wide and the “makeup sponges” phrase sized to 2.75” wide.
- The circle shapes are for cutting the adhesive-backed cardstock for the mason jar lid toppers. Measure the size of your lids to ensure these templates will fit. Duplicate or adjust the circle shapes as needed to fit your lids.
- Color sync the images if needed to match the color of the material.
Cutting
- Select “Make It” in Design Space.
- For cutting phrases, set the material type to Premium Vinyl.
- Follow prompts for loading the mat into the Cricut Maker or Cricut Joy and cutting the Premium Vinyl. When prompted, unload the mat from the cutting machine.
- Remove the Premium Vinyl from the mat.
- For cutting the lid toppers, set the material type to Cardstock with adhesive backing.
- Follow prompts for loading the mat into the Cricut Maker or Cricut Joy and cutting the toppers.
- When prompted, unload the mat from the cutting machine.
- Remove the adhesive-backed cardstock from the mat.
How to Assemble the Jars
- Cut around each image with a pair of scissors.
- Using the weeding tool, peel away the excess vinyl around the cut images and discard.
- Cut a piece of transfer tape a bit larger than the size of the image.
- Peel away the transfer tape backing and place the transfer tape over the top of the cut image. Gently rub the vinyl to help it stick to the transfer tape.
- Peel away the vinyl backing, leaving just the image adhered to the transfer tape.
- Position the phrase with the transfer tape on to the smooth side of a jar and press in place.
- Press the vinyl phrase down with your fingers to help it to stick to the painted glass jar.
- Slowly and carefully remove the transfer tape leaving the vinyl image on the jar.
- Repeat for the other mason jars and phrases.
How to Assemble the Jar Lids
- Drill one hole the same size at the screw size for the knob through the center of the mason jar lid. Take extra care when handling sharp metal edges.
- Peel off one of the cardstock circles from the backing and place over the top of the mason jar lid.
- If the lid is in two parts, glue them together using a hot glue gun with clear glue sticks.
- Screw the decorative knob onto the mason jar lid.
- Repeat with the remaining lids.
- To finish, fill the containers with your bathroom essentials.

Ellen is a busy mom of a 24-year-old son and 29-year-old daughter. She owns six blogs and is addicted to social media. She believes that it doesn’t have to be difficult to lead a healthy life. She shares simple healthy living tips to show busy women how to lead fulfilling lives. If you’d like to work together, email info@confessionsofanover-workedmom.com to chat.
Can’t wait to make these. I need to find crafts to keep me busy now that I am retired. Thank you
You are very welcome! Thanks for stopping by!
Beautiful idea!! Sure inspires me to start a set for myself.
Thanks so much!