
Last Updated on January 28, 2023 by Ellen Christian
Did you know that beeswax wraps are an alternative to plastic wrap? They can be made at home! Learn how to make beeswax wraps right here.
Posts may be sponsored. This post contains affiliate links, which means I will make a commission at no extra cost to you should you click through and make a purchase. As an Amazon Associate I earn from qualifying purchases.
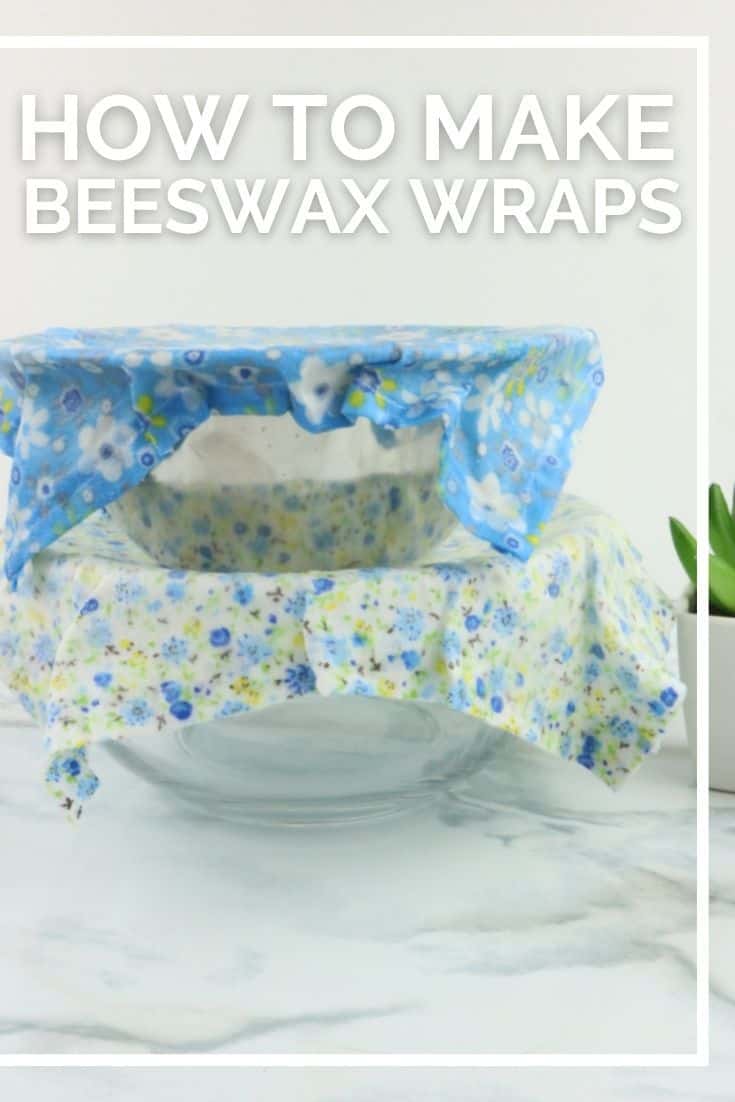
How to Make Beeswax Wraps
Making your own bee wax wraps has never been easier thanks to this step-by-step guide. Waxing the fabric will make it waterproof and durable against wear, making it perfect for storing food or wrapping a gift without worrying about damaging the contents of what’s being wrapped.
If you’re working on reducing your plastic usage, you might want to check out these tips on how to declutter your kitchen.
Years ago, I found a package of beeswax wraps at a local farmer’s market. I’d seen these on eco-friendly websites but had no idea that they were something you could make at home.
Since I’m always interested in reducing my plastic usage, I wanted to share how to make wraps out of beeswax with you so you could try it.
What is a beeswax wrap and why should you use it
Beeswax wraps are a healthy alternative to plastic cling wrap or aluminum foil because it’s natural, renewable and unbleached. Beeswax wraps reduce air and water pollution as well as reduce the need for certain chemical preservatives that promote safety but can be dangerous if they leak into food.
No products found.
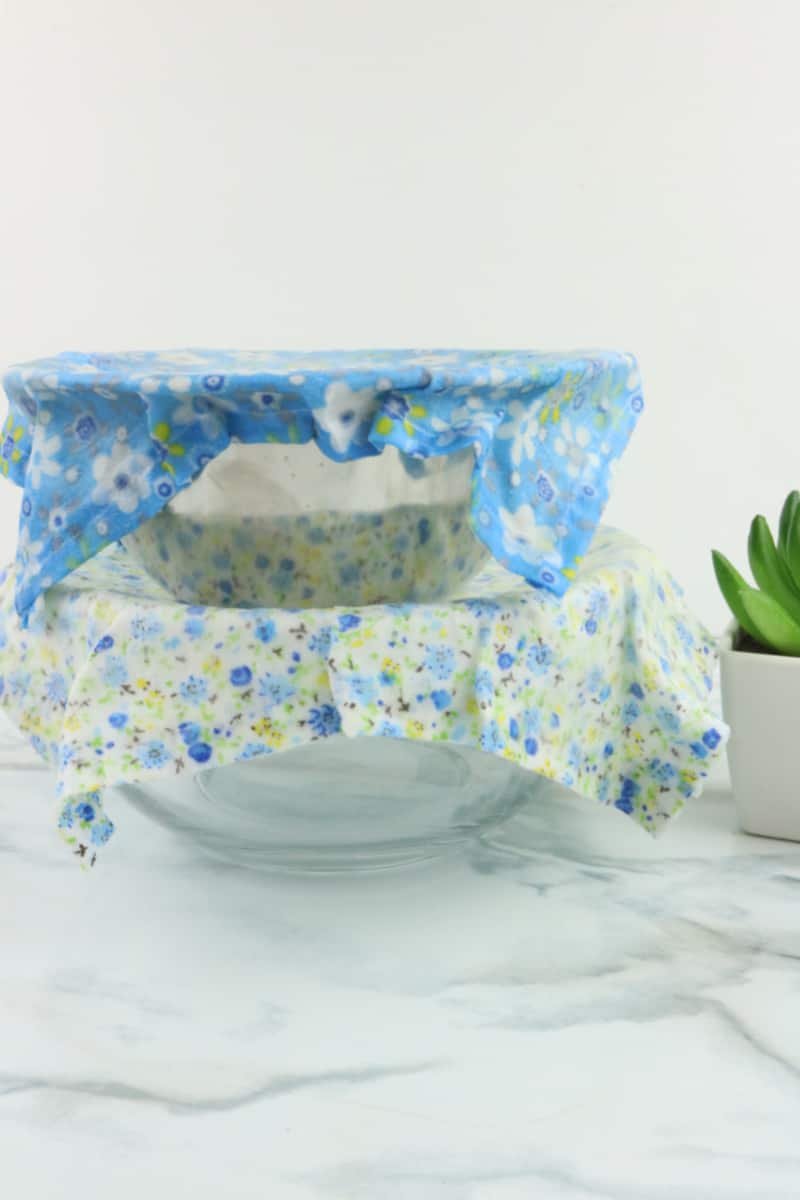
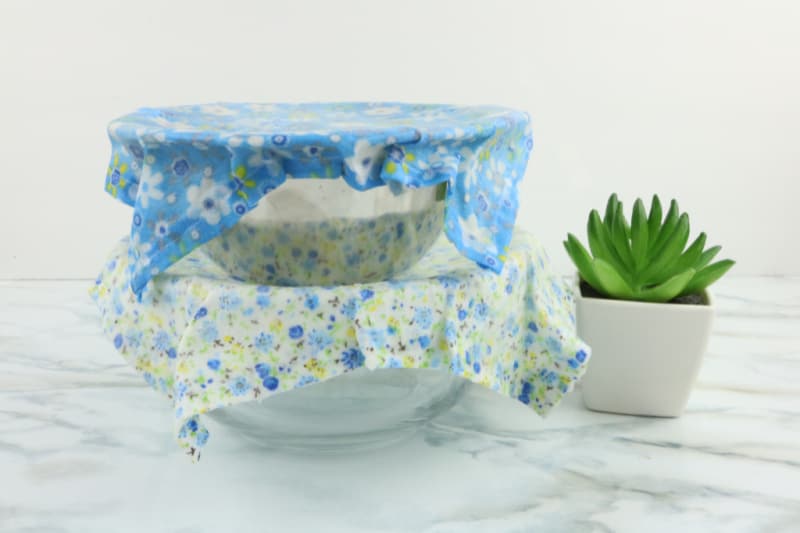
Tips on using the wraps for food storage
Beeswax wraps are the perfect way to preserve your favorite foods and keep them fresh. Warm the wrap briefly in your hands.
Then, wrap up cheese, fruit, or vegetables in one of these natural wax-coated sheets.
It cools quickly after being heated with your hands. As it cools, it holds the shape of what you wrapped with it.
Do not use these for raw meat or fish.
Should beeswax wraps be sticky?
Yes, homemade beeswax wraps will be slightly sticky. This is because of the plant resin in the beeswax and it’s the reason that your wrap sticks to your dish or bowl.
You can activate it by warming it slightly between your hands.
Types of food that can be stored with a wax wrap
- Bread
- Fruit
- Vegetables
- Cheese
- Baked goods
You can also use it to cover bowls, plates, and casserole dishes to store your leftovers.

Materials for this project
Supplies:
- Scissors
- Fabric Clips or Pins
- Wax Paper
- Cookie Sheet
- Fabric (sizes depend on bowl sizes)
- Paint Brush or Pastry Brush
- White Beeswax Pellets (you only need about 1 Tbsp per cover)
- Sewing Machine
- Thread (match fabric color)
How to make beeswax wraps
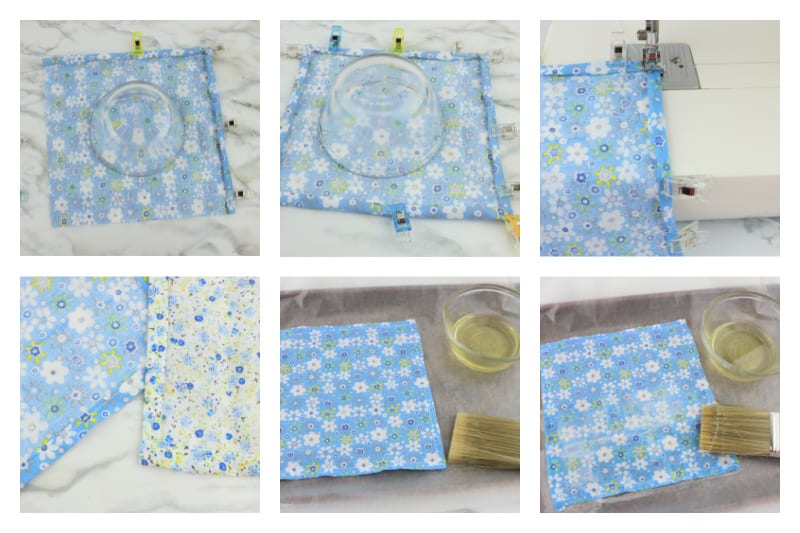
- Cut the fabric to the size needed. Lay the bowl you want to make it for on the fabric then cut it so that it is about 1.5 to 2 inches past the bowl. Cut it out in a square.
- Lay the fabric face down. Fold the edges over by about 1/4 inch or a little less. Then fold it over again and clip it in place. Do this all the way around the fabric so all the raw edges are hidden.
- Place the fabric on the sewing machine with the foot of the machine on the inner edge of the fold. Sew as close to that inner edge as you can. Be sure to do a backstitch at the start and finish. You want to sew all the way around. It’s best to turn the corners by lowering the needle when you get to the corner, then lift the foot and swing the fabric around. Lower the foot again and keep sewing.
- Lay a piece of wax paper on the cookie sheet. You can clip it to the edge of the cookie sheet using sewing clips. Heat the wax in the microwave 20 seconds at a time and stir each time until fully melted. Lay the fabric so that it is face-up on the wax paper. Dip the paintbrush in the melted wax and lightly brush the fabric with the wax. It just needs to be coated lightly, not super thick.
- Allow it to cool then remove from wax paper.

How to clean beeswax wraps
Beeswax wraps are great for preserving the freshness of food, but they need to be given a little TLC from time to time. After using your wrap, you have two options:
- Simply wipe down with a damp cloth and let it air dry by itself
- Soak in cold water with some soap suds for 5-10 minutes then rinse off by hand before letting it air dry.
More eco-friendly crafts
Or you make want to learn how to make cranberry juice.
How to Make Beeswax Wraps
Did you know that beeswax wraps are an alternative to plastic wrap? They can be made at home! Learn how to make beeswax wraps right here.
Materials
- Scissors
- Fabric Clips or Pins
- Wax Paper
- Cookie Sheet
- Fabric (sizes depend on bowl sizes)
- Paint Brush or Pastry Brush
- White Beeswax Pellets (you only need about 1 Tbsp per cover)
- Sewing Machine
- Thread (match fabric color)
Tools
- sewing machine
Instructions
- Cut the fabric to the size needed. Lay the bowl you want to make it for on the fabric then cut it so that it is about 1.5 to 2 inches past the bowl. Cut it out in a square.
- Lay the fabric face down. Fold the edges over by about 1/4 inch or a little less. Then fold it over again and clip it in place. Do this all the way around the fabric so all the raw edges are hidden.
- Place the fabric on the sewing machine with the foot of the machine on the inner edge of the fold. Sew as close to that inner edge as you can. Be sure to do a backstitch at the start and finish. You want to sew all the way around. It’s best to turn the corners by lowering the needle when you get to the corner, then lift the foot and swing the fabric around. Lower the foot again and keep sewing.
- Lay a piece of wax paper on the cookie sheet. You can clip it to the edge of the cookie sheet using sewing clips. Heat the wax in the microwave 20 seconds at a time and stir each time until fully melted. Lay the fabric so that it is face-up on the wax paper. Dip the paintbrush in the melted wax and lightly brush the fabric with the wax. It just needs to be coated lightly, not super thick.
- Allow it to cool then remove from wax paper.

Ellen is a busy mom of a 24-year-old son and 29-year-old daughter. She owns six blogs and is addicted to social media. She believes that it doesn’t have to be difficult to lead a healthy life. She shares simple healthy living tips to show busy women how to lead fulfilling lives. If you’d like to work together, email info@confessionsofanover-workedmom.com to chat.
How do you store these beeswax wraps? I’m assuming you can’t fold them because it would crack the beeswax layer?
Correct, you cannot fold them. I store them flat on a shelf.
Do you wash them or toss them?
Thanks for stopping by! You gently wipe them off with a damp cloth and re-use them.
Love this – I think it is much more sustainable to make your own beeswax wraps instead of buying some online or at a store. Plus, you can make them with some super cute fabrics! 🙂
Jenna ♥
Very true. Thanks for stopping by!