
Last Updated on April 22, 2022 by Ellen Christian
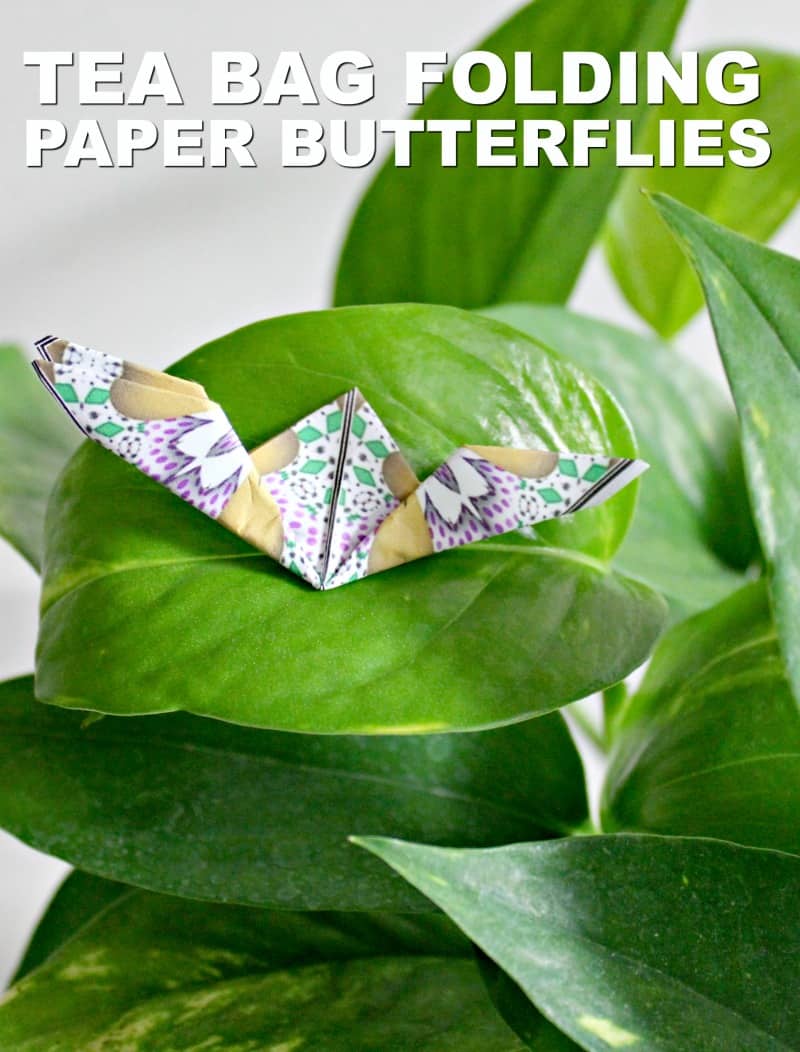
Making butterflies with paper is very simple to do. There is just something happy and cheerful about butterflies that makes me smile. While I cannot always see them from my office, I can always add a few paper butterflies to bring spring inside.
Posts may be sponsored. This post contains affiliate links, which means I will make a commission at no extra cost to you should you click through and make a purchase. As an Amazon Associate I earn from qualifying purchases.

Making Butterflies with Paper
Years ago, when the kids were tiny, I sold crafts online and at a craft fair. I burned out after a particularly busy season. But, I still enjoy crafting when I have time. Most of the time, I stick with easy crafts that only take a few minutes to do. I originally published this post back in 2013. But, I wanted to redo it with some more current photos and better directions. You can see one of my original photos below that I particularly liked.
I love crafting with paper. There are a lot of different types of paper folding techniques that you can use when making butterflies. Some are very complicated and take a long time. The ones I’ll share with you are fairly simple and many can be done by a child.

Before you start, you will want teabag folding paper, origami paper, and scrapbook paper. You’ll also need scissors, a ruler, a fine tip pen, a glue stick, and a note card.

Teabag folding
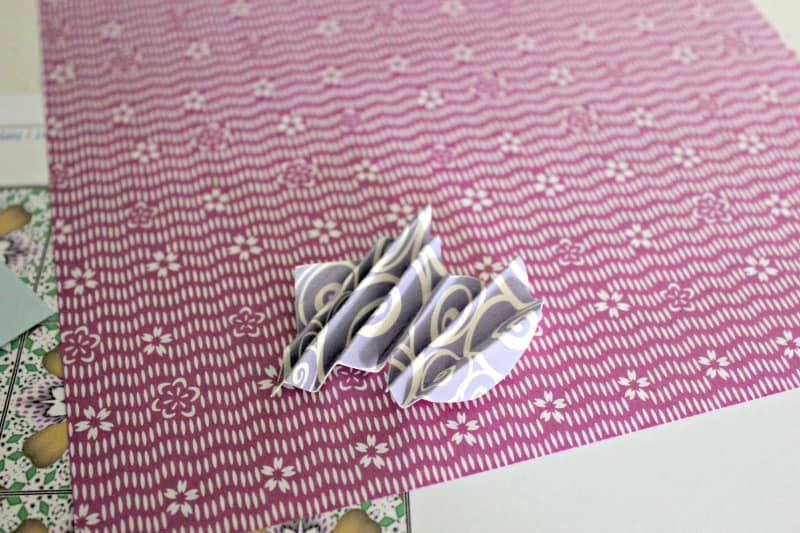
Teabag folding is a paper folding technique that originated in The Netherlands. It uses small, square pieces of paper with symmetrical patterns. They are folded in a way that the final project has a 3D look. I use origami papers or teabag tiles when I do teabag folding.
You can purchase teabag tiles or print your own for free. There are many different types of butterfly folds you can do with teabag folding. You can find the directions I used here.

- Print out a sheet of tiles in your color preference. This is the sheet I used.
- Cut the sheet of tiles into a four-square pattern.
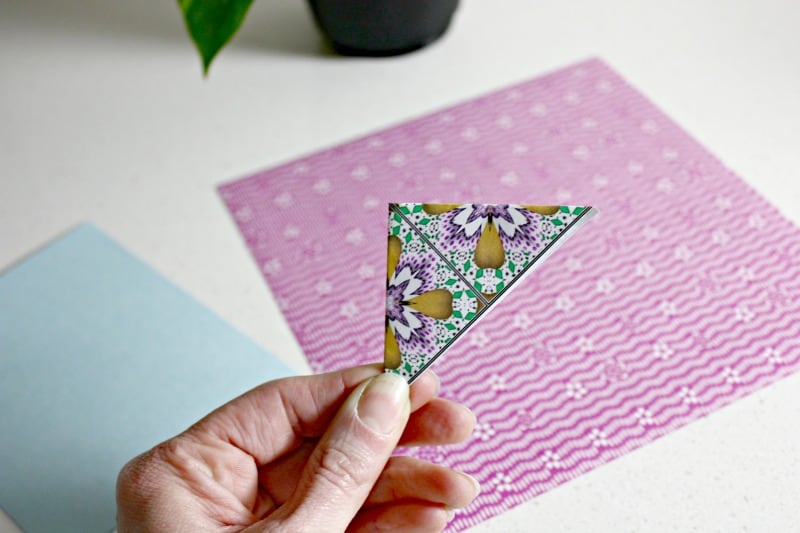
- Fold it in half and then in half again.

- Then fold the top point down slightly over the bottom part.
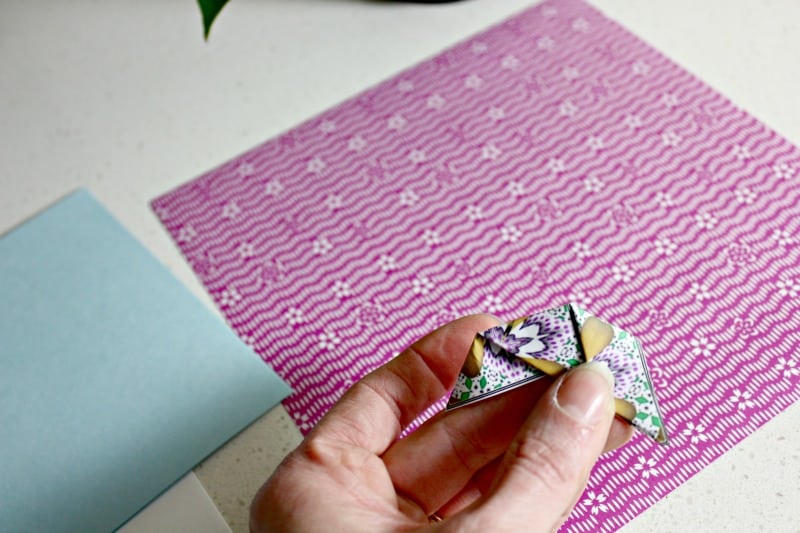
- Fold the left and right sides down to form the wings.
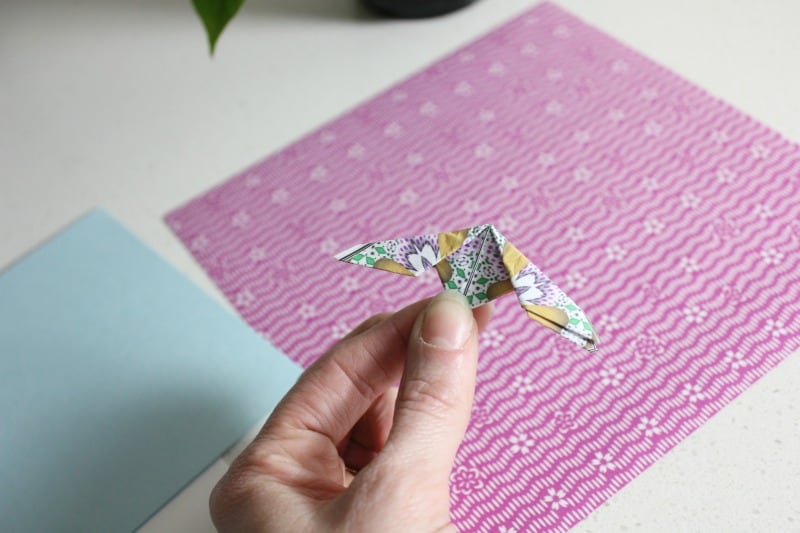
- You can fold one or two tiles. You can use two tiles to make a butterfly as I did on the card above (back in 2013). Or, one tile to make a more simple butterfly.
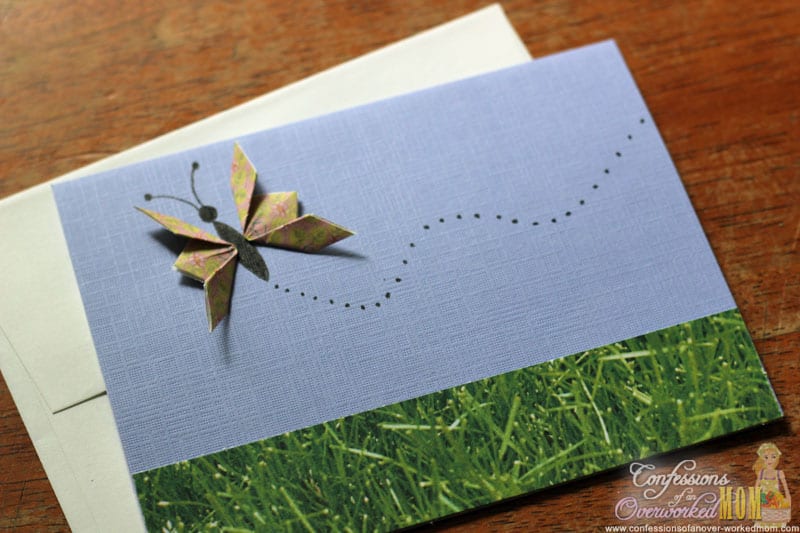
- Draw the body of the butterfly and the feelers using a fine point marker on a plain note card or sheet of paper.
- Draw a line of dots to show the butterfly’s flight.
I used a blue card and cut off a strip of scrapbook paper that had a green grass pattern to give mine the look of a butterfly flying in the air. You can do yours that way or any way that inspires you.
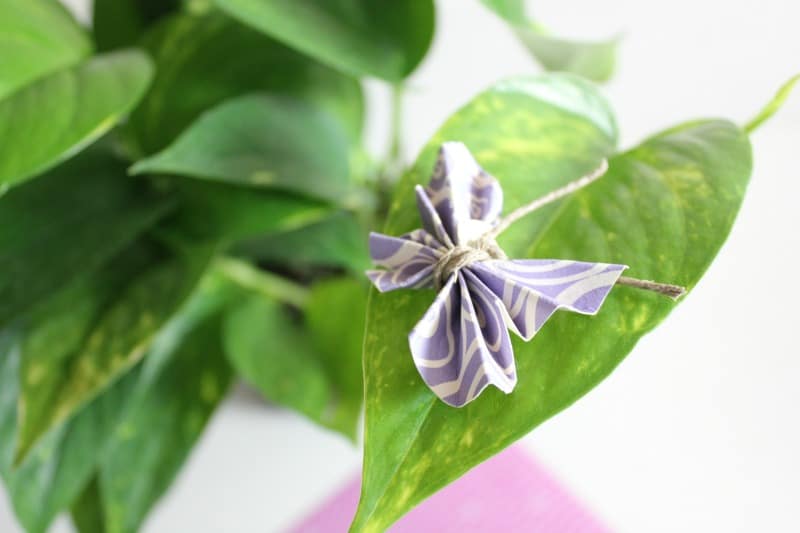
Fan Folding
Fan folding is simply creating many of the same folds on one piece of paper. If you remember making paper fans when you were in elementary school, it’s the same basic process. You can attach your butterfly to a party invitation, a homemade card or make a mobile of them to decorate your home.
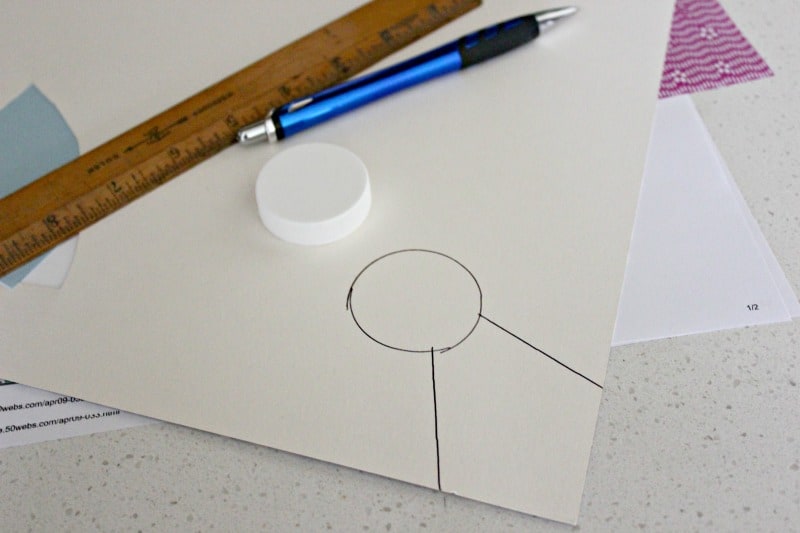
- Trace a circle around the top of a small cup or cap. Then draw lines the way I did in the picture above. I used scrapbook paper but you can use what you have.
- Then, starting at the pointed end, start fan folding to the end. Make sure you press down tight.

- Using ribbon or twine, tie a knot in the center. This forms the butterfly’s antenna.
- Gently spread out the folds.
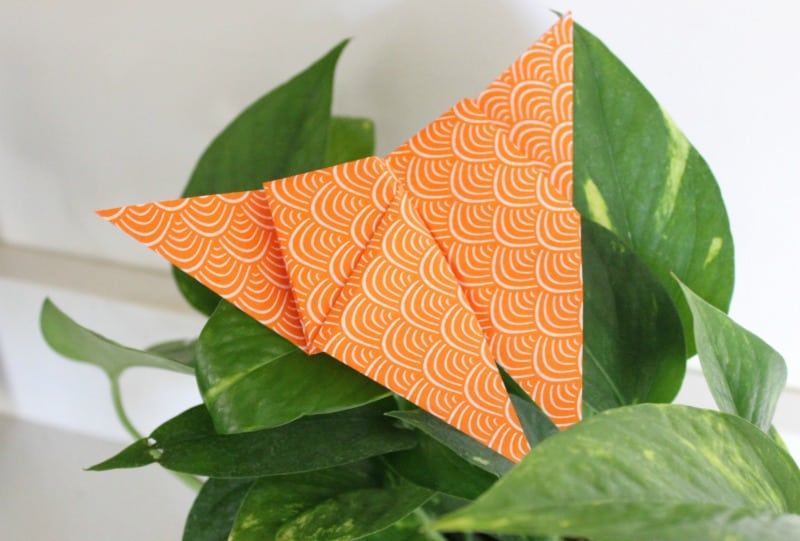
Making butterflies with paper – Origami
Origami is the Japanese art of paper folding. Unlike teabag folding, origami creations are typically made with one piece of paper that is folded in many ways to create a 3D project. The paper you use for an origami project should be lightweight. I use special origami papers but if you do not have those, you can use wrapping paper instead.

Before we begin, you need to know two terms. A valley fold is when you fold the paper in toward you so you see the center or valley when you look into it. A mountain fold is when you fold the paper away from you so you see the edge of the outer fold when you look into it.
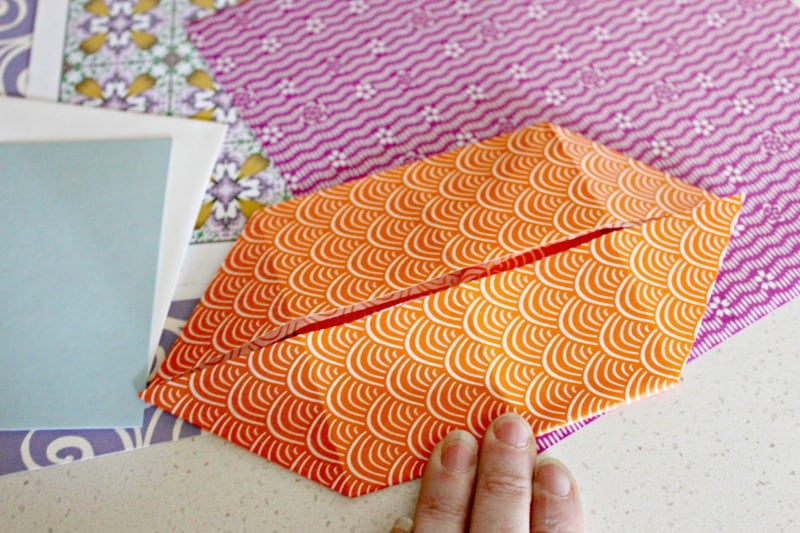
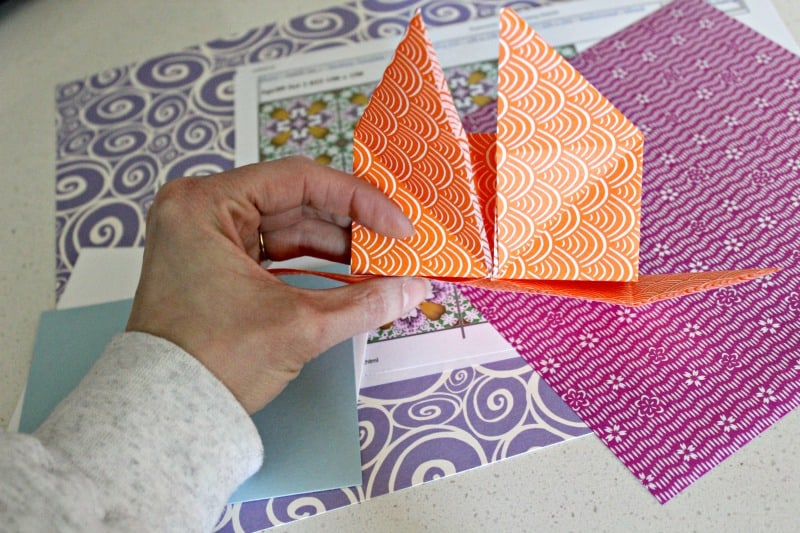
- Start with a basic boat fold (above). This is one of the easiest origami folds. If you don’t know it, you can find it here.

- Then fold the left and right points to the top center.
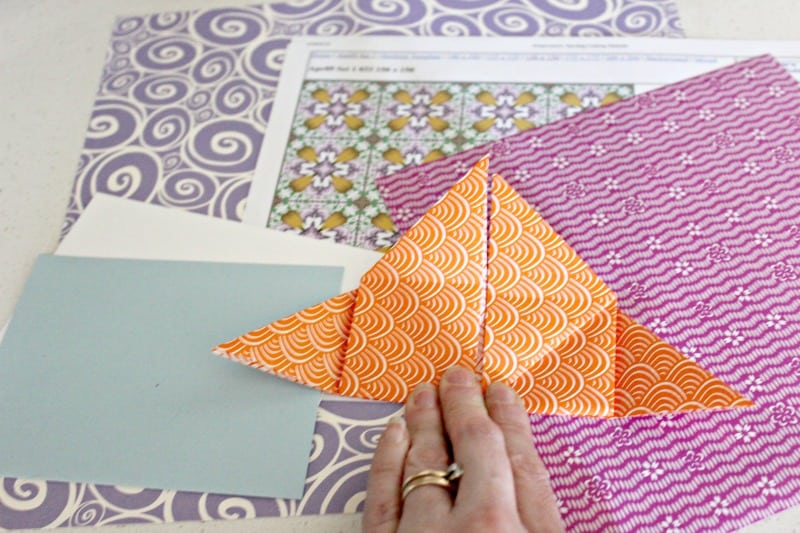
- Make a mountain fold and bring the top half under the bottom half.
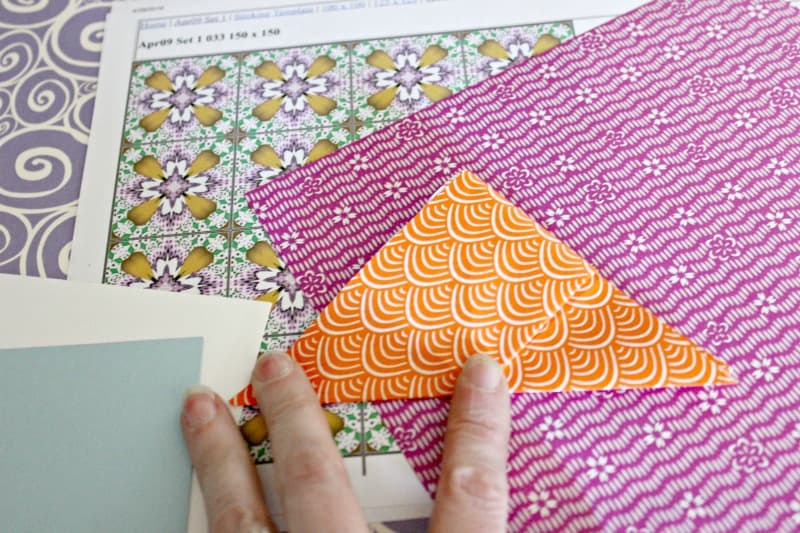
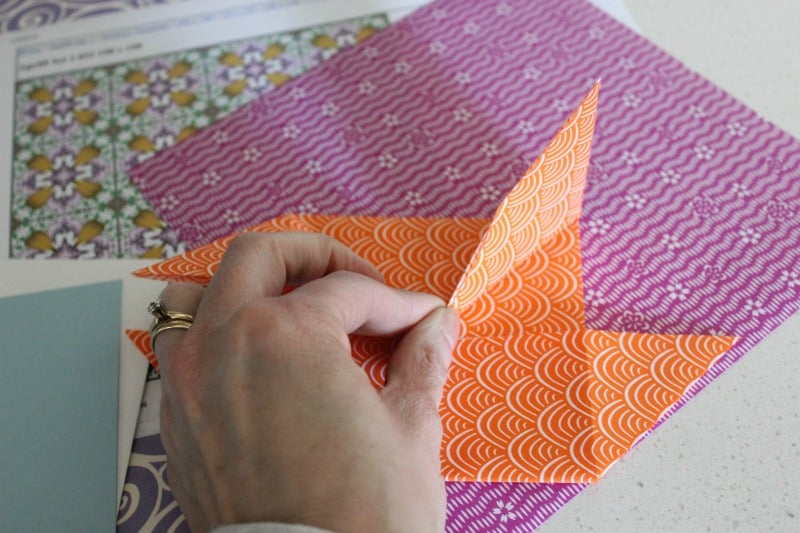
- Then make another mountain fold in half to make a smaller triangle.
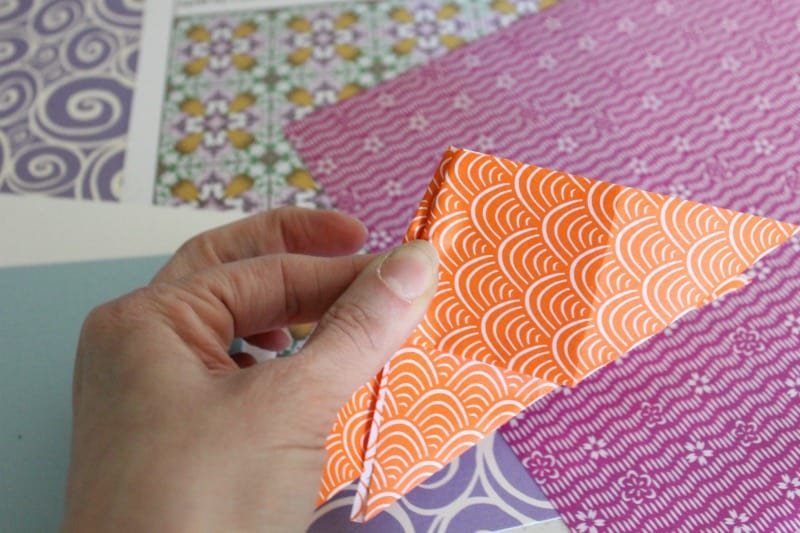
- Make a small fold in the top left corner and open gently.
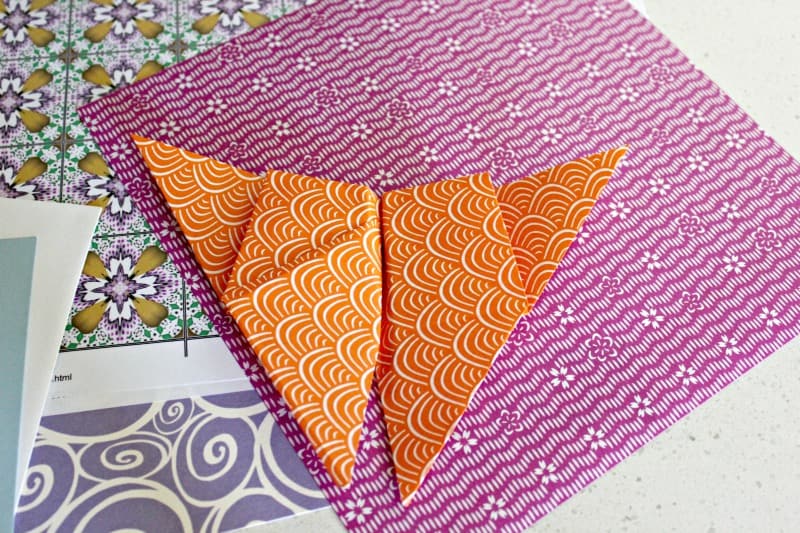
These are the directions I followed to create my origami butterfly.
I used a full sheet of origami paper and that made an origami butterfly about the size of my palm. If you want a smaller butterfly, cut the paper in four squares.
Love simple crafts? Check out these button crafts. Or, try this autumn maple leaf iris folding pattern.

Ellen is a busy mom of a 24-year-old son and 29-year-old daughter. She owns six blogs and is addicted to social media. She believes that it doesn’t have to be difficult to lead a healthy life. She shares simple healthy living tips to show busy women how to lead fulfilling lives. If you’d like to work together, email info@confessionsofanover-workedmom.com to chat.
I receive your updates, popping by to check out this craft, so pretty, I love origami. Since you mentioned refreshing your post I would love to have you share on my #Soisn bloghop, hope you’ll check it out, great for #organictraffic!!
Thanks, Karen. I’ll check it out!