
Last Updated on February 14, 2023 by Ellen Christian
Wondering how to stencil on tin? Learn how to paint on metal without bleeding and and how to paint designs on metal with this simple hack.
Posts may be sponsored. This post contains affiliate links, which means I will make a commission at no extra cost to you should you click through and make a purchase. As an Amazon Associate I earn from qualifying purchases.
How to Stencil on Tin
My Grandmother is the last person on my Christmas gift list that I need to find a present for. She is 92 and in a nursing home so it isn’t easy to find something that she wants and needs for Christmas.
I love giving homemade Christmas cookies and candy for the holidays but since she is diabetic, I don’t want to give her treats that she shouldn’t be eating.
Since I know that she loves sugar free hard candy, I decided to stop at the candy store in our mall and pick some up for her.

I found a great selection of sugar free candies for her at the mall but I wanted something pretty to put them in. Since I was mailing them, I didn’t want to put them in a basket.
I wanted something that would keep them safe during the journey to her and look cute when she got the present. I decided to stencil a tin to put her Christmas candy in.

These are the supplies you’ll need:
- Tin
- Painter’s tape
- Sharpie Fine Point Markers in the colors you want your letters
- Sharpie Fine Point Metallic Markers for the snowflake
- Acrylic paint in antique white

How to paint on metal with stencils
The first thing that I did was tape off the border of the tin using painters’ tape so that when I painted it, the edges were crisp and clean. if you are going to paint the entire tin and not just a square on one side, you will only need to tape off the hardware. Using acrylic paint, paint the area that you want to stencil. You may need to paint it with two or three coats depending on how well it covers the surface.
Let the tin dry completely and remove the painters’ tape. Make any needed touch ups to the acrylic paint.
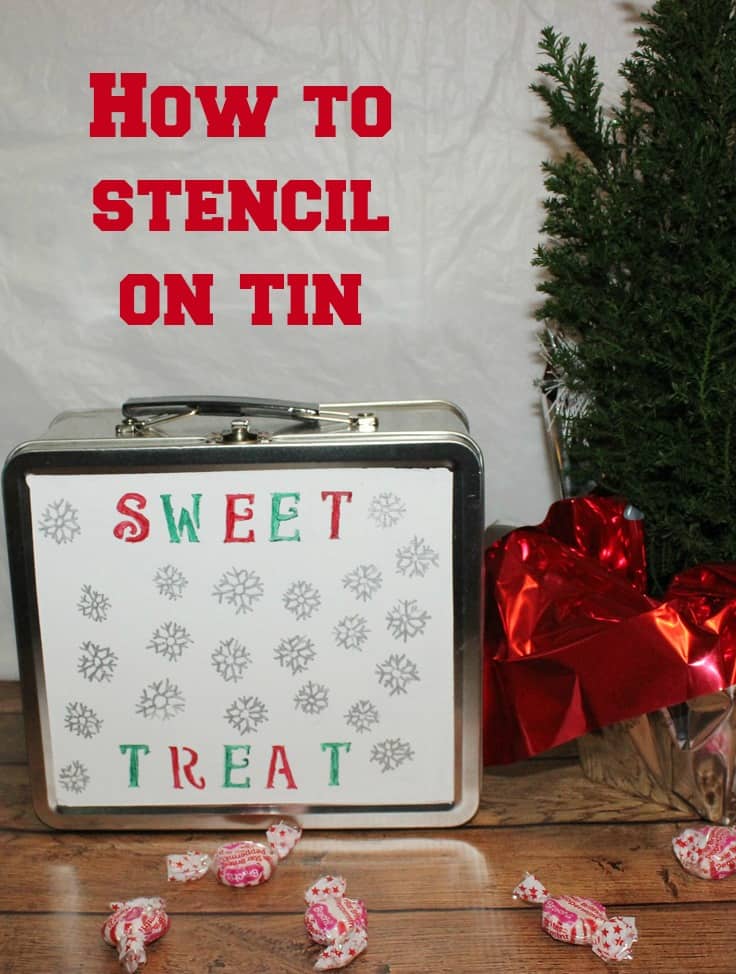
Since I’m filling my tin with candies, I wanted to stencil something on the front that fit that theme. I decided that “Sweet Treat” would work perfectly.
So, I used peel and stick stencils so that they would stay in place on the tin. I very carefully colored in the letters using red and green Sharpie Fine Tip Markers. It is so much easier to stencil small areas using Sharpies than it is with acrylic paint.

To fill in the blank space in between the words, I drew snowflakes. I am not an artist so they are drawn stick figure style using the silver metallic Sharpie Marker.
If you have more artistic ability than I do, you could draw a Christmas tree, angel, nativity scene or any other type of holiday picture.

Visit Staples this holiday and purchase the 12 count multi-colored pack of Sharpies and the Sharpie Metallic Assorted 4 count. Depending on what you’re drawing, you’ll want to pick up the new Neon 5 count pack as well. The Metallic and Neon are on sale for only $5 and the 12 count is on sale for $6! This is a great time to stock up on Sharpies!
Finally, here are a few Christmas party favors you can make.

Ellen is a busy mom of a 24-year-old son and 29-year-old daughter. She owns six blogs and is addicted to social media. She believes that it doesn’t have to be difficult to lead a healthy life. She shares simple healthy living tips to show busy women how to lead fulfilling lives. If you’d like to work together, email info@confessionsofanover-workedmom.com to chat.
33 thoughts on “How to Stencil on Tin”